Data Loss Prevention (DLP) is a huge topic and with GDPR and privacy legislation in Australia, data breach notification is mandatory and leaks are newsworthy. People who leak are becoming martyrs – just think about Edward Snowden and Julian Assange.
Implementing a custom DLP policy in Office 365 is a bit of a learning curve, it involves importing a custom XML, working with RegEx and A LOT of testing. We found that, even for a single word it can be tricky and not work as expected.
WHERE IT SHINES
DLP is extremely useful in cases where the word or phrase isn’t common or is unique to your business such as a credit card number, unique employee ID or top-secret file naming convention.
Here is a sample XML file for detecting a string “#TOP-SECRET#”. This should be unique enough that it won’t trigger unnecessarily (its case sensitive) and you can put this classification in your top-secret documents. The string in the entity is a normal Regex expression which means it’s extremely powerful. There are also ways to match data to other nearby data such as a Credit Card number and the expiry date but for this blog we are keeping it simple. I won’t go into explaining the XML as there is a good guide here.
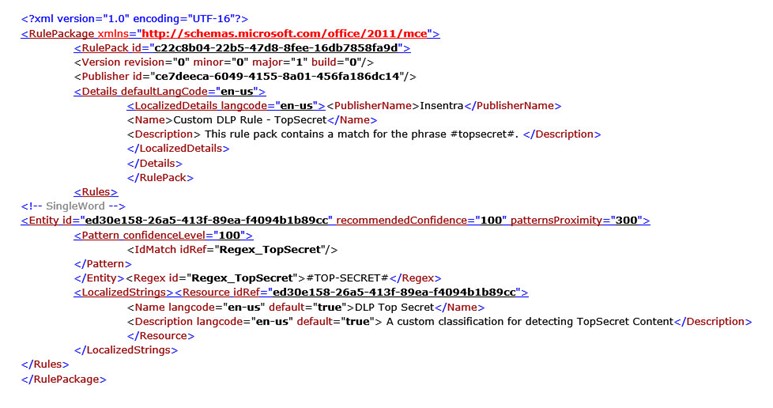

Steps to use the new rule
1. Import the rule to Office 365 DLP (Connect to Office 365 Security and Compliance PowerShell first)

2. Logon to the Security and Compliance Center and click on Policy -> Create a Policy

3. Choose a Custom Policy and click Next
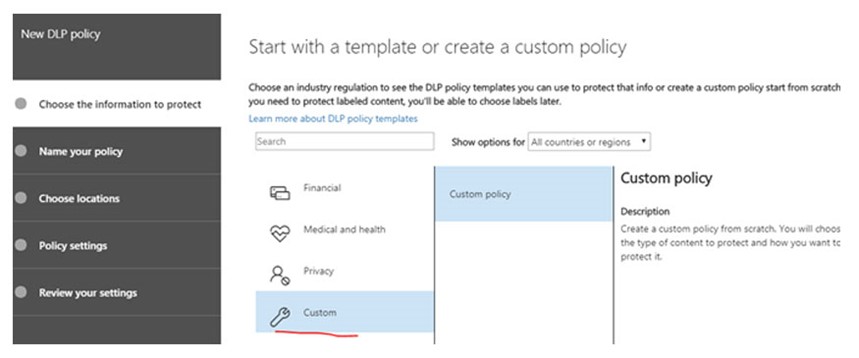
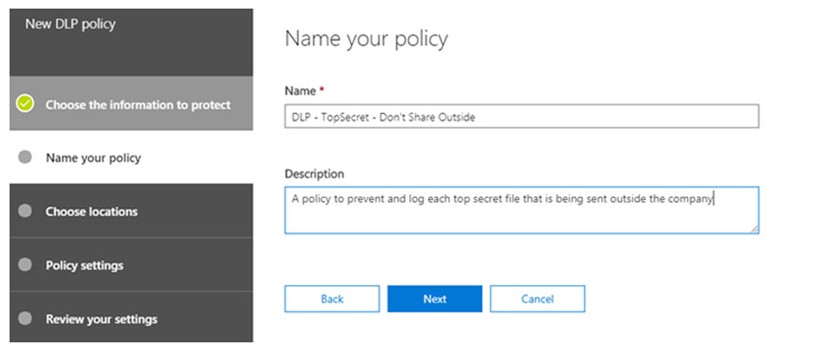
4. Name your policy and give it a description
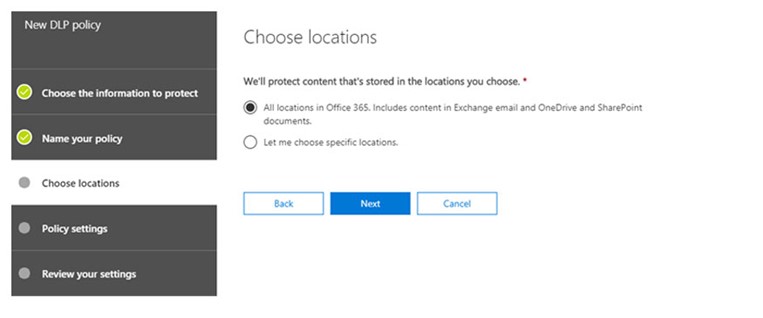
5. Choose where to protect your content, for this test we will protect all data (SharePoint, OneDrive and Exchange)
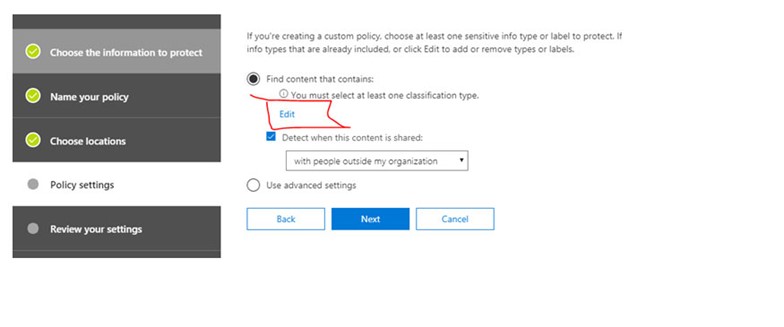
6. On the policy settings screen – choose “Edit”
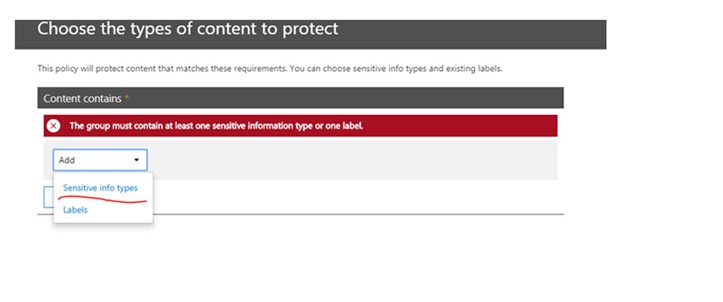
7. Drop down the menu and choose “Sensitive Information Types”
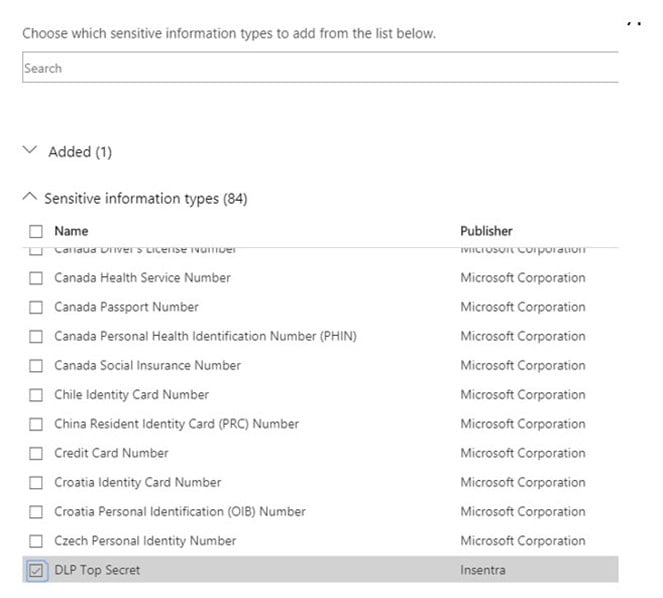
8. Click on “Add” then choose the sensitive information type you imported
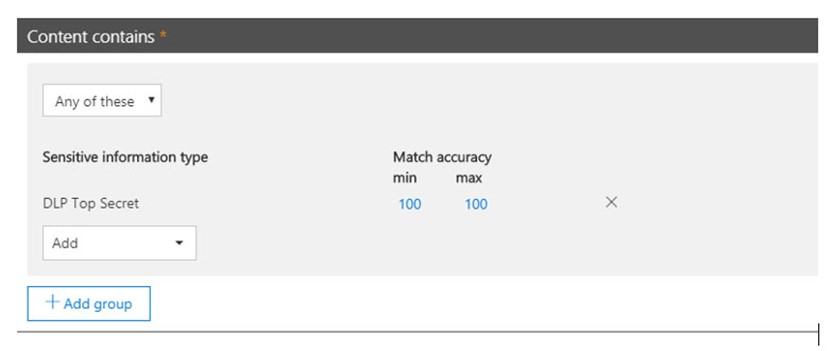
9. Leave the accuracy Min and Max at 100 as this is an exact match scenario and click “Save”
10. Customize the notification settings with your rule to match what you require – make sure you put the “Detect when content that’s being shared contains” down to 1 instance – otherwise it will be hard to trigger this rule
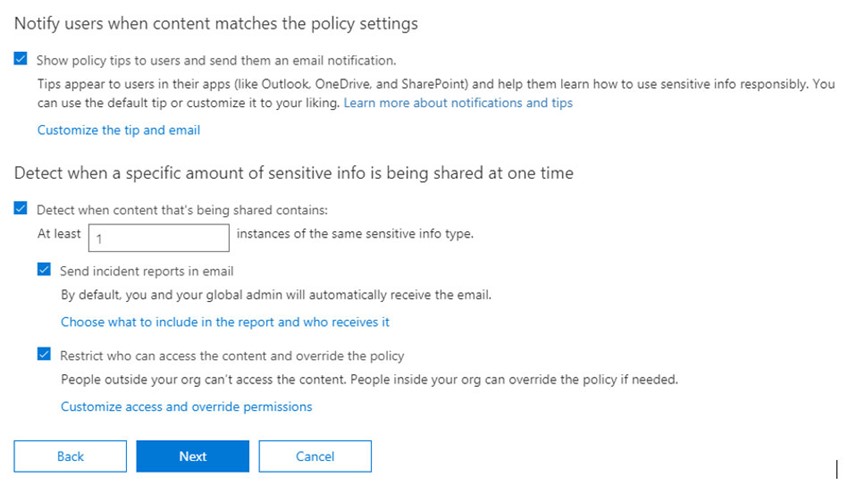
11. Review the settings of the rule and click on “Create” – Then wait at least 15-30 minutes before testing the rule.
The rule will then block your email based on the conditions you set!
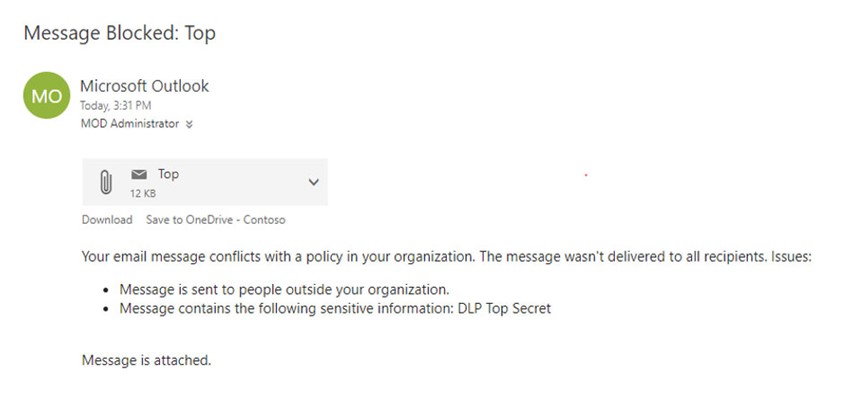
THINGS TO BE AWARE OF
- DLP takes time to scan so, in a large email with an attachment of 30 pages, looking for a specific word could take a long time.
- Sometimes scans don’t finish and an email is sent, triggering a bounce back once the scan finished.
- DLP, if not configured well it can trigger far too often.
OWN UP TO YOUR LEAKS OR FACE CONSEQUENCES!
Given the new legislation around the globe, every business needs to take note of DLP right now. The implications are significant:
“In a stark departure from previous privacy legislation in Europe or elsewhere, the GDPR authorizes regulators to levy remarkably steep fines in amounts exceeding 20 million euros or four percent of annual global turnover, whichever is higher.”
Recently we have been testing these scenarios as we are working towards compliance baselines and they have already made their mark. Don’t worry – we don’t name things top secret.


