One of the features from the Microsoft 365 (M365) Information Protection stack is “Sensitivity Labels”. It is essentially a method to enable users to classify the content being produced by assigning a label. The labels can also be applied automatically, however this feature has specific licensing requirements which can be found here.
Once the content has been classified using a sensitivity label it aids the information protection process by either marking or encrypting the content, or you can even choose to not apply any protection. When a label’s protection setting is set to “Mark the content of file”, the label and description can be shown either in the header or footer or as a watermark depending upon configuration.
You can learn more about information protection and data security in this series by Lee Foster, Global Head of Advisory called The Secure Workplace Story.
CONFIGURING SENSITIVITY LABELS
This blog provides configuration steps to implement sensitivity labels with basic protection settings. This will help to introduce the concept of sensitivity labels to end users.
1. From the M365 Compliance Center, select Information Protection and Create a label

2. Provide a name for the label. This can be different to the Display name; M365 administrators use this while managing and publishing the label. The display name and description are seen by the end-user
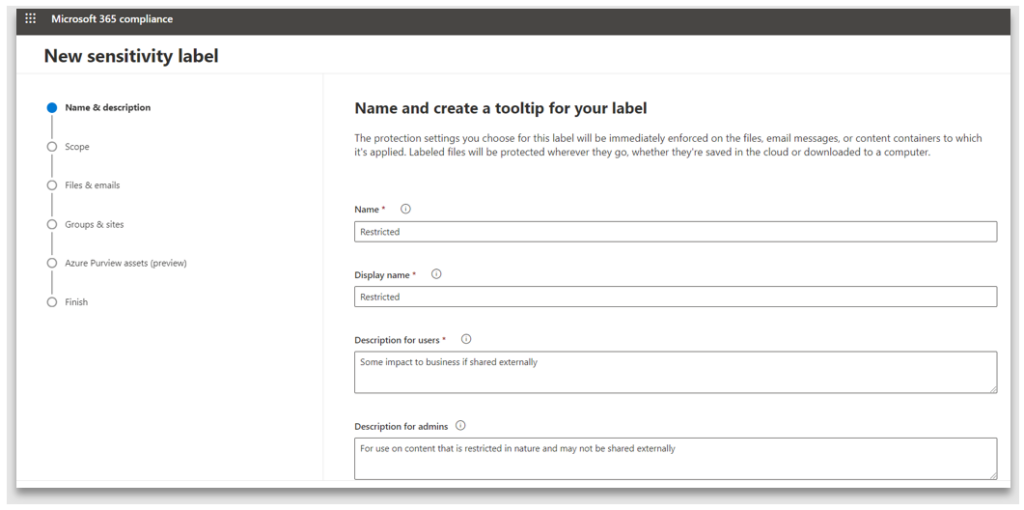
3. Scope defines which content and containers this label can be applied to. In this example, only Files and emails is selected, making it unavailable for use on containers and auto labelling
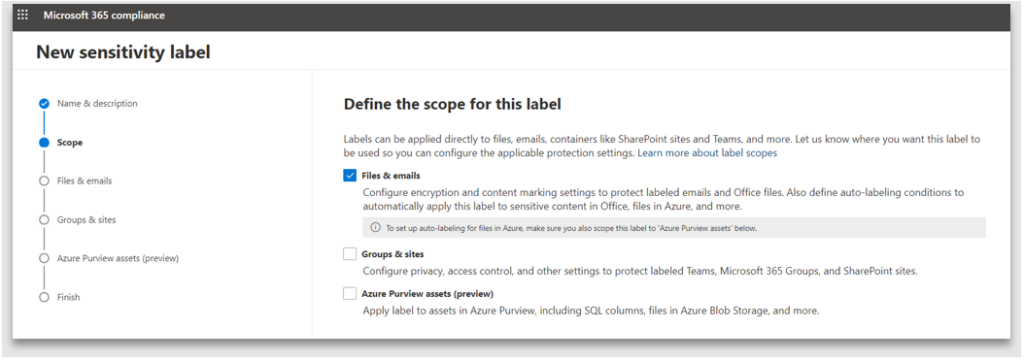
4. Protection settings enables either encryption of the content and/ or marking of the content. Note: the watermarks cannot be applied to emails, they can only be applied to documents
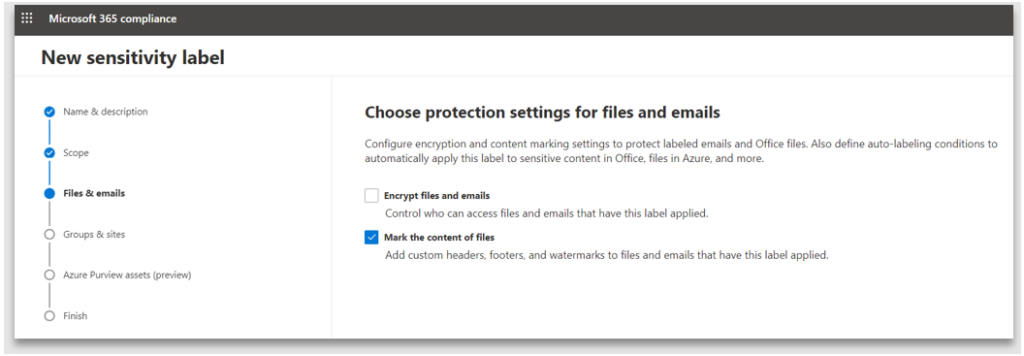
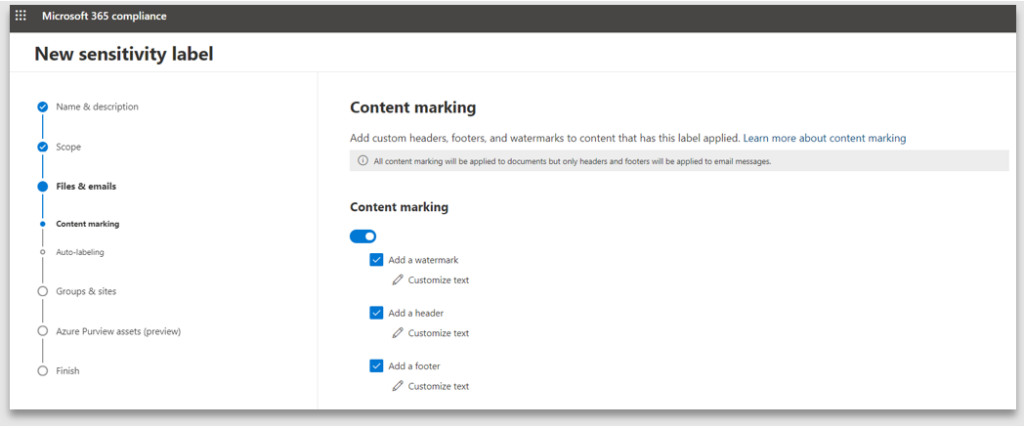
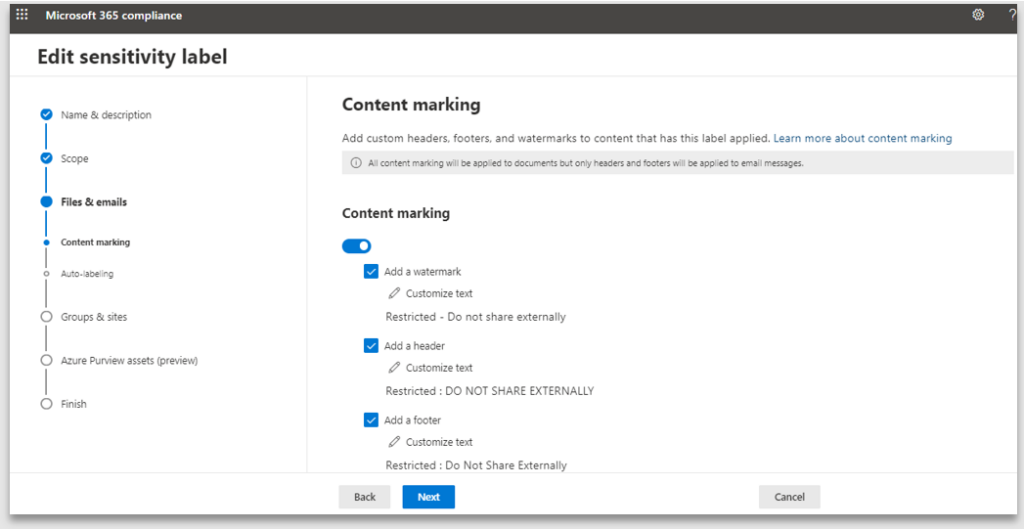
5. Content marking provides the ability to specify the header, footer and watermark text, size and positioning. If you do not enable Content marking, the end user can apply the label, however the document will not have any protection markings
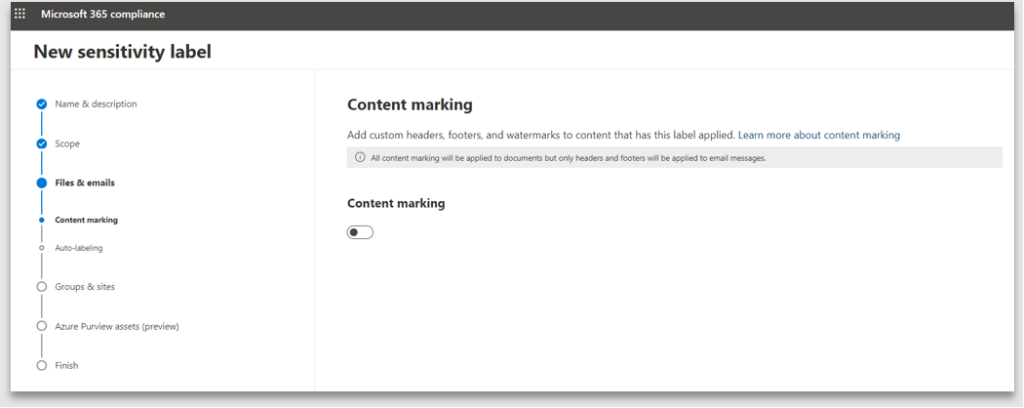
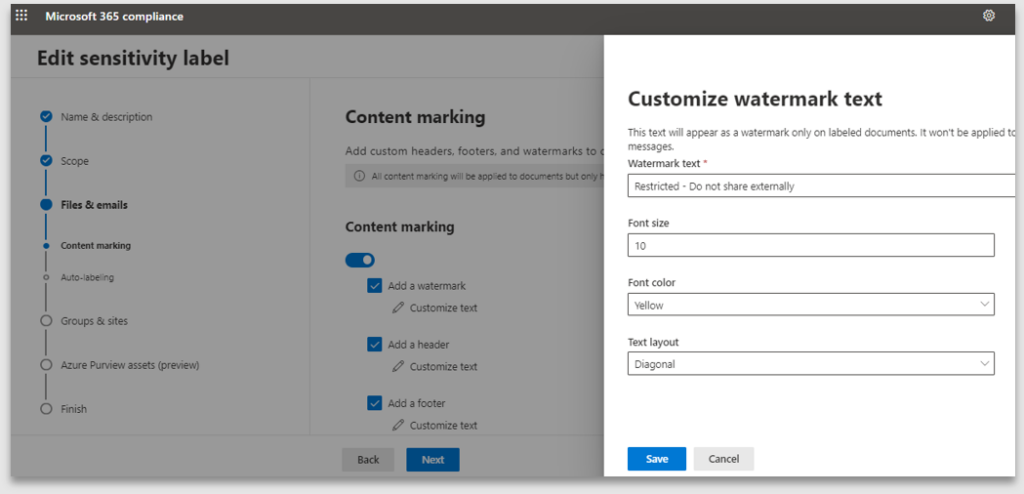
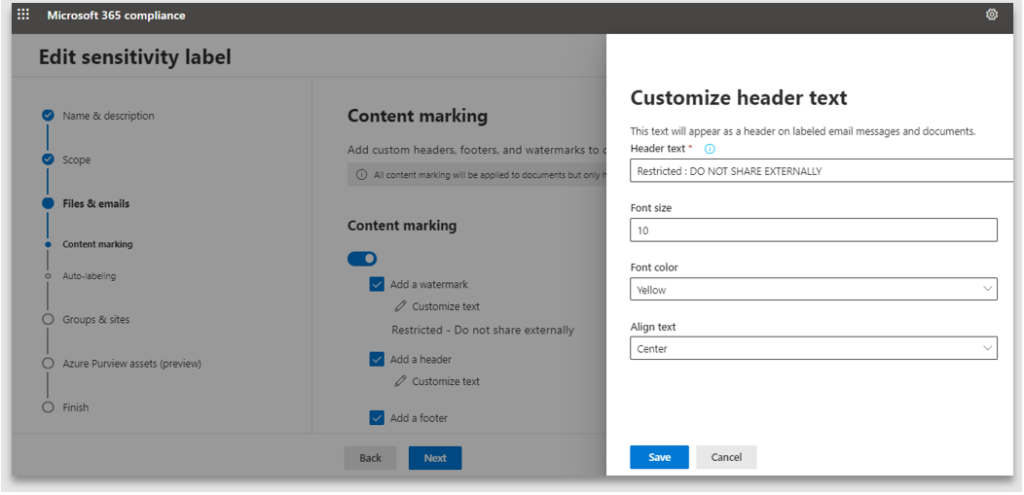
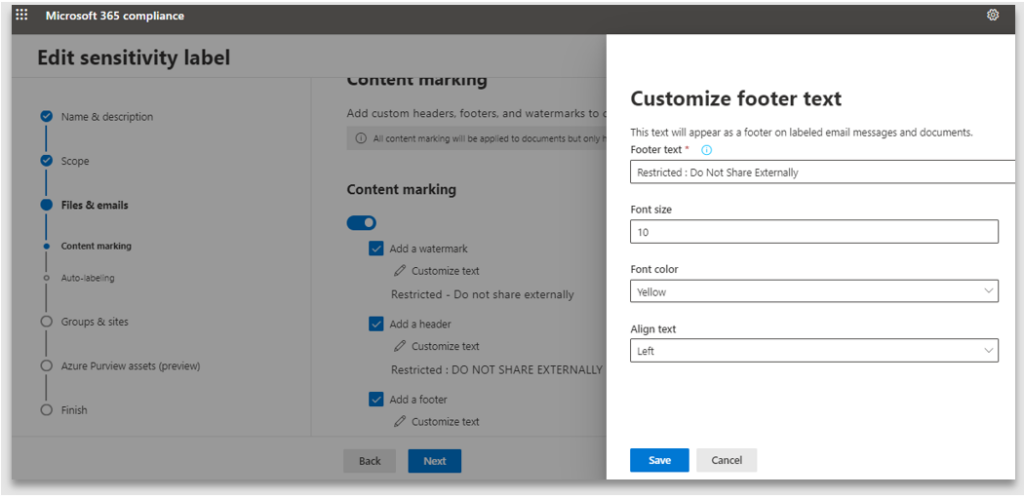
6. Note: the customized text is case sensitive and will be applied exactly how it has been configured
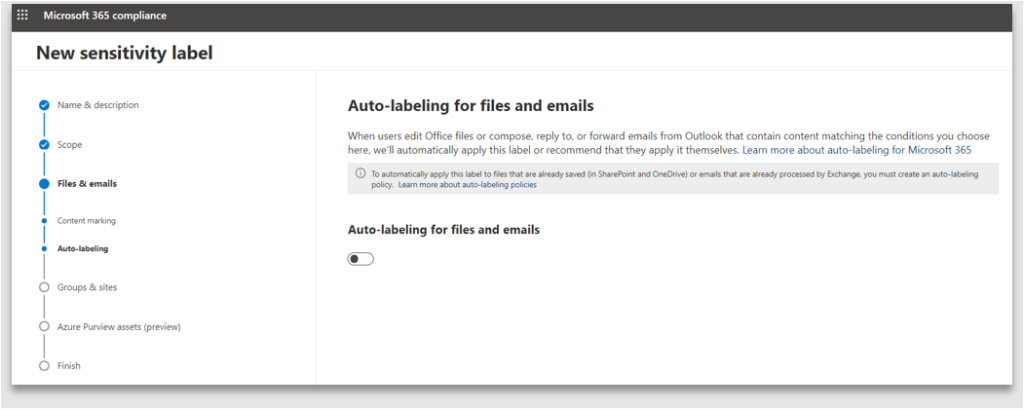
7. Auto-labelling can either recommend a label to the user or automatically apply a label based on the conditions met by the content. There will be a future blog [LR1] on how to configure and use the Auto-labelling functionality
8. The protection settings for containers and Azure Preview are greyed out as they were not selected in the scope


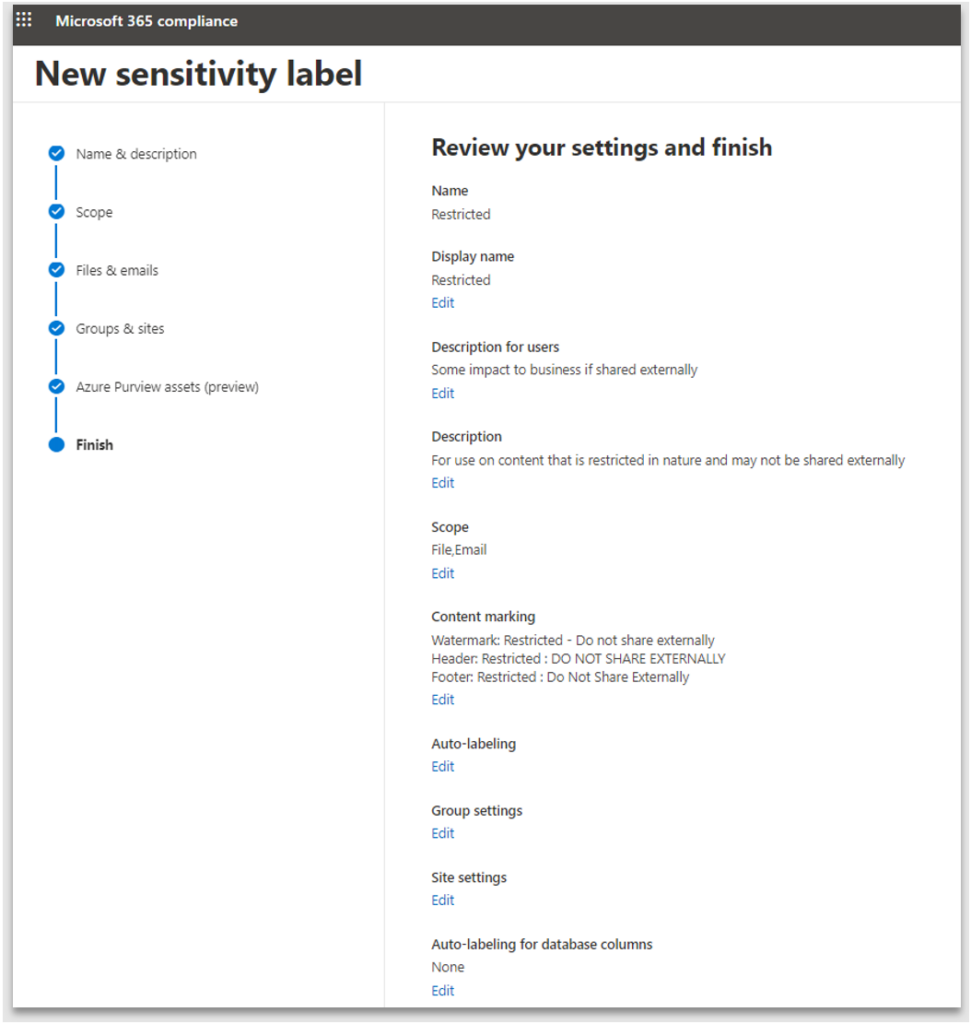
9. Finally review the settings and click Create label
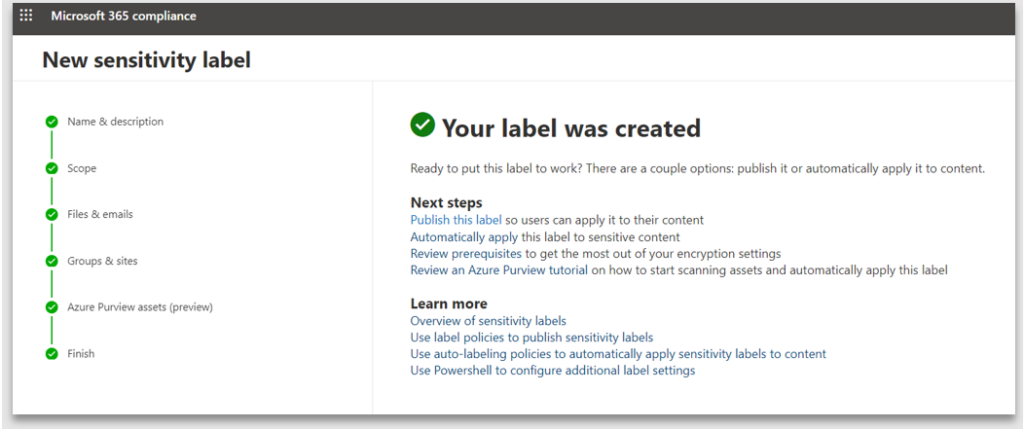
10. A confirmation screen is displayed, informing of success or failure, and the label is listed in the home screen of Information Protection
11. Observe how a newly created label has been assigned the highest order. In this example we will lower the Order, thereby making it less restrictive and low in priority
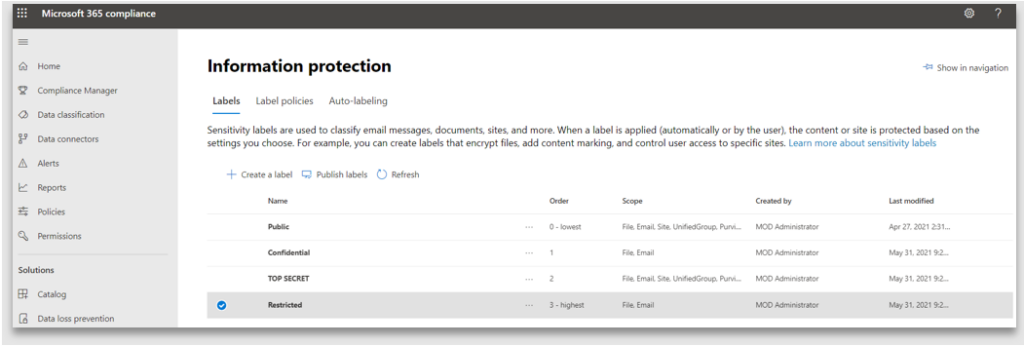

Labels must be published to the users to make them available and only to those users with permissions to classify the content using the label. For instance, a user from the legal department may require a different set of labels from a user in marketing or sales. Whereas some users like a receptionist, should not be classifying the content at all.
Observe how the “Restricted” label is not available for use by the user.

Steps to publish a label are below:
- From the Label policies tab, click Publish label

2. Choose the sensitivity label to publish. Here “Restricted” is selected for publishing


3. Select Users and groups who will be allowed to use the label. In this example it is published to all users and groups, thus making it available to every user in the organisation

Policy settings enables enforcing of label policy by either defaulting a label or forcing the user to apply a label or ask for justification text if the default label is a higher priority than the user chooses. Hence, the order of priority matters when enforcing the label policy. By not configuring any of the settings, the label usage becomes optional

4. Provide a meaningful name to the policy
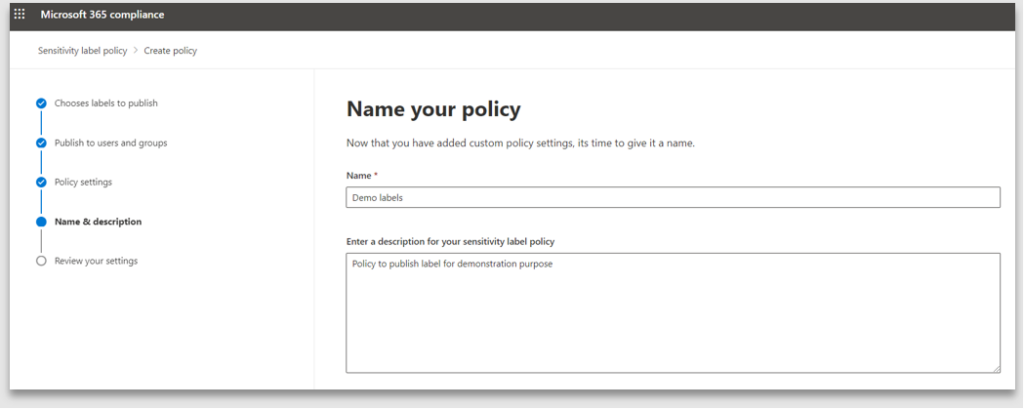
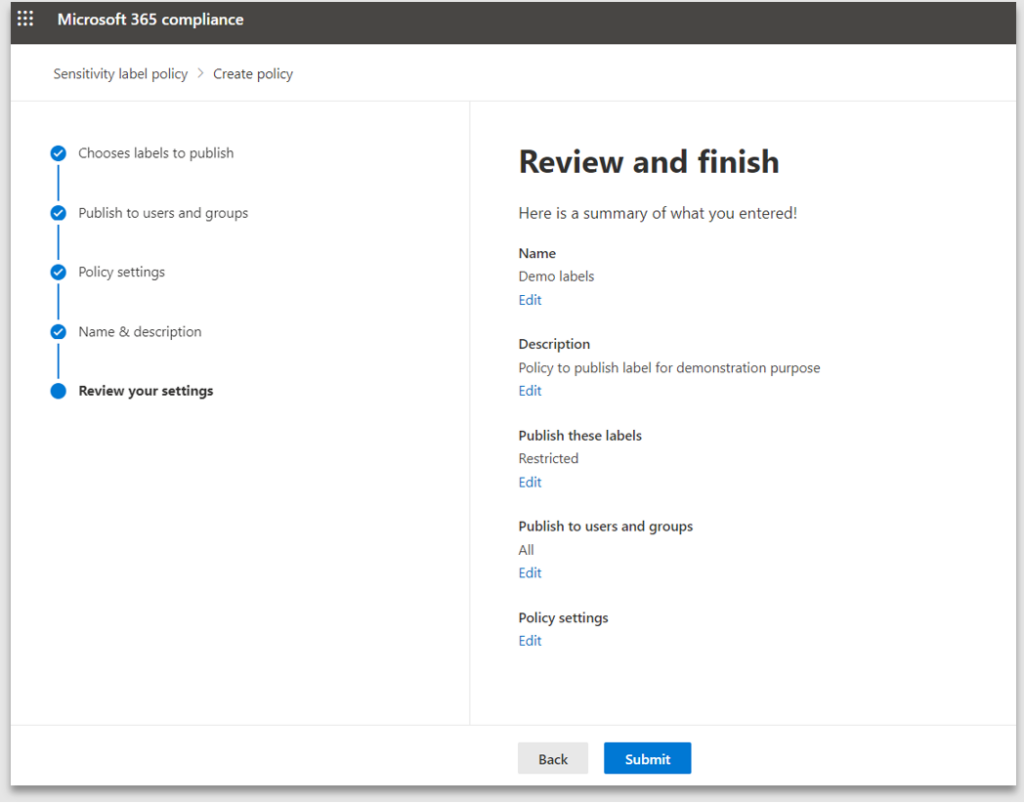
5. Review and click Submit to start the publishing process
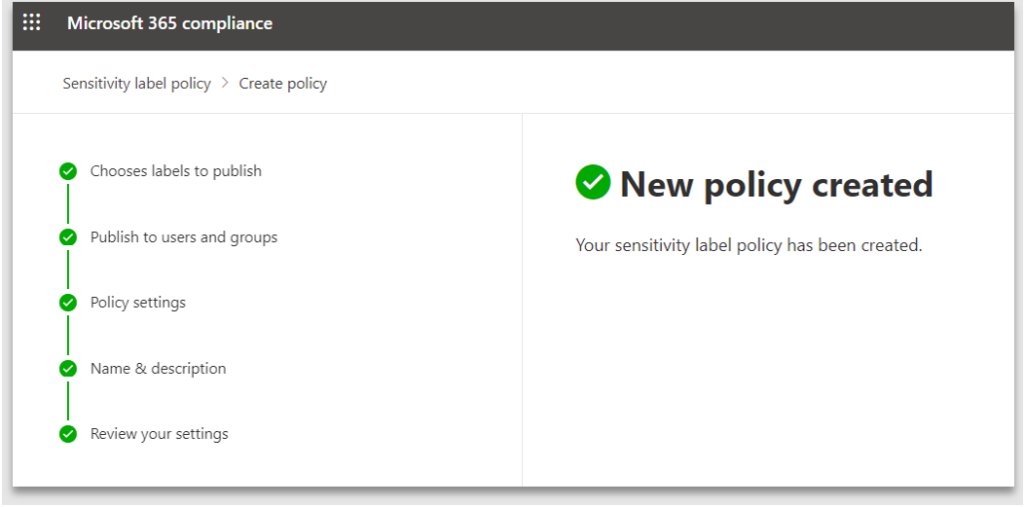
6. An information screen confirming the label policy has been created successfully
7. The newly created label policy is listed under the Label policies tab. It may take between one to twenty-four hours before the new label is available for use by the user

8. Observe how the “Restricted” label is now available for use by the end user. The label description helps users in choosing the right label

Once applied, the label is displayed in the status bar of the Office application. It should be noted, there is no header, footer or watermark applied when content marking is not selected during the label configuration
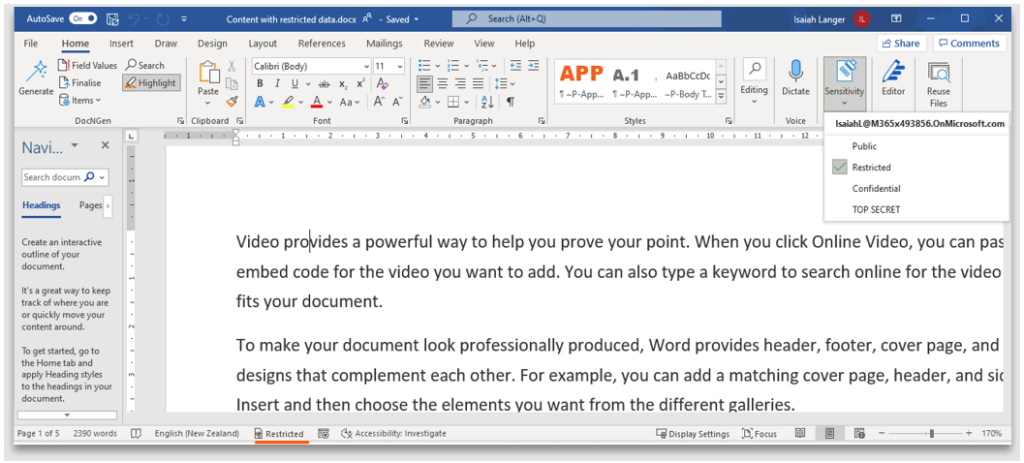
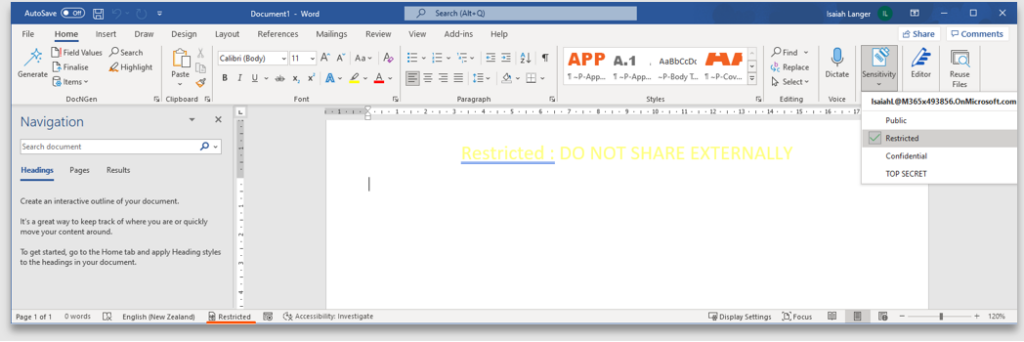
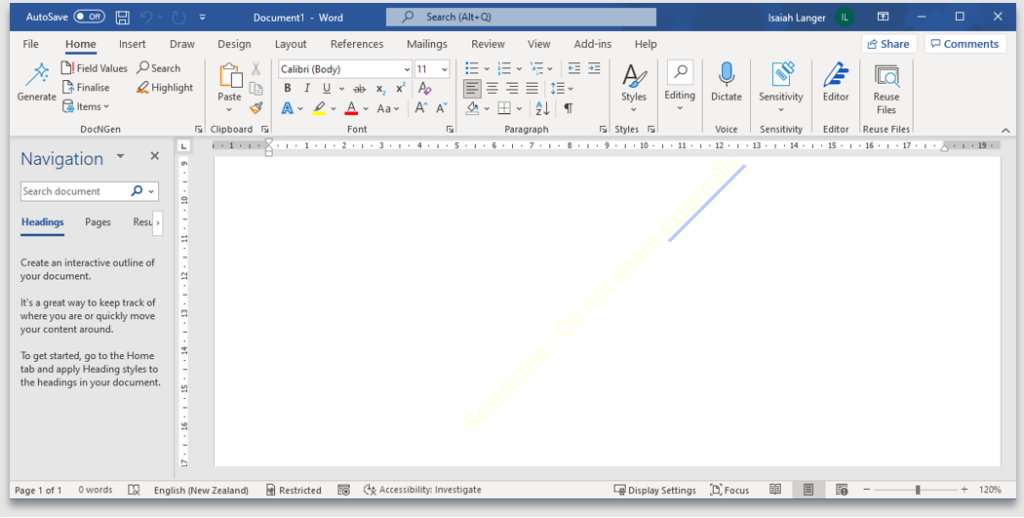
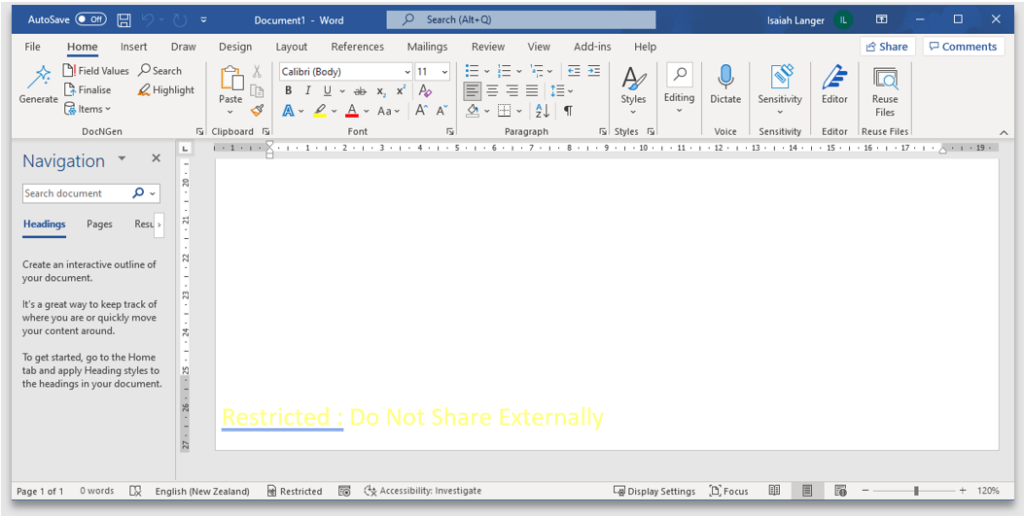
9. The header, footer, and watermark text is case sensitive and appears in the case it was configured
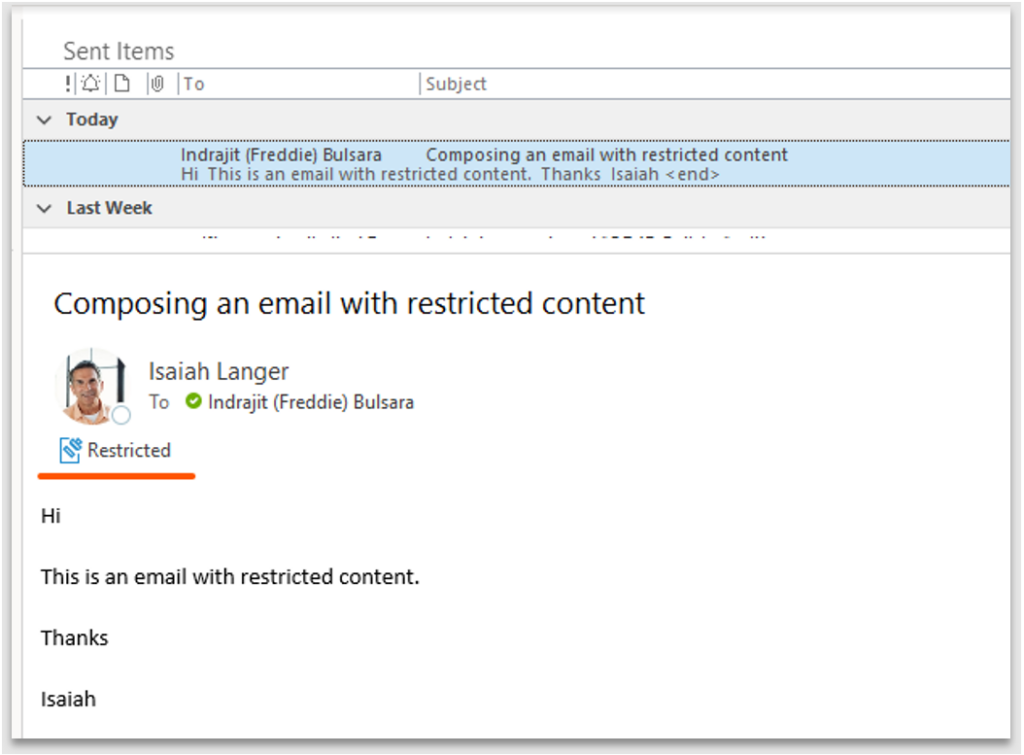
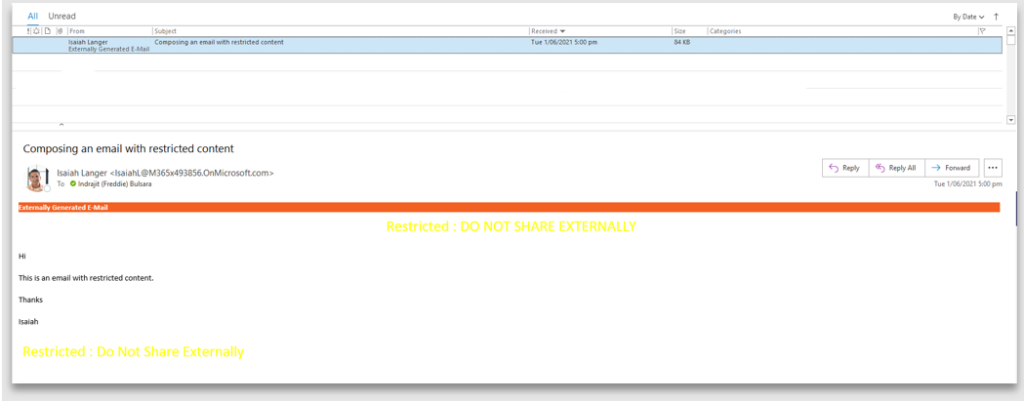
10. Observe the label when applied to an email

Email in Sent Items:
How the email recipient sees it:
I hope this blog was helpful in providing an understanding of how the sensitivity labels can be configured and the resulting outcome of applying them. In a future blog we will see how the sensitivity labels can be used with other features of the Information Protection stack.
Watch this episode of the Late Night Brew where Azure Information Protection was unpacked.


