Thousands of websites, businesses and organizations use Xwiki to collect and organize knowledge and make it accessible to others due to its strong, multilingual, open-source, expandable, adaptable, trustworthy (and free) features. In this article we look at deploying the Xwiki using containers, but this time we will use Podman pods (a series of subcommands which manage pods or groups of containers).
WHAT IS A POD?
Often associated with Kubernetes (also known as K8s), many fail to consider the potential role pods could play in localised runtimes, particularly when they use containers during development. Most who use Docker do not understand the idea of operating pods.
In addition to using pods to automatically group containers, there are several convincing reasons when using them locally:
- Consider the situation when you need to use a MariaDB container for numerous containers. With a pod you could bind the database to the localhost address of the pod and make it available to the common network namespace. Any containers in this pod would then be able to connect to it. However, you should avoid connecting this database to a routable network, either within your bridge or elsewhere.
- Podman pods are similar to the Kubernetes definition; managing a group of application containers as one pod.
- An “infra” container exists in each Podman pod. The only function of this container is to keep track of the namespaces related to the pod and allow Podman to connect additional containers. Conversely, if any other container controlled the pod it would not be possible to start and stop this container (within the pod) as it would stop/remove the entire namespace. Unless you specifically state otherwise, all pods will have an infra container based on the default image (which is the k8s.gcr.io/pause image).
Most of the pod’s attributes are assigned to the infra container. The infra container is given access to kernel namespaces, port bindings and cgroup-parent variable (because these attributes are allocated to the infra container after the pod is built they cannot be modified). For instance, Podman won’t be able to add a container which exposes new ports to a pod after it has been already created. You would need to recreate the pod with the additional port bindings before adding such a container.
REQUIREMENTS
- Build the RHEL 9.0 server with at least 4vCPUs and 8GB RAM.
- Ensure an additional 20-30GB of storage has been allocated to /var/lib/containers and the file system has been created on LVM volume.
- Ensure the host has a FQDN and both: A and PTR records have been registered in the DNS.
- Register the server using subscription manager (in case of Red Hat Enterprise Linux server).
INSTALLATION
- Register the server to access the package repositories:
# subscription-manager register- Update the server:
# dnf upgrade --refresh -y- Install podman packages:
# dnf install podman podman-remote podman-docker podman-plugins -y - Create a dedicated container network for the pod:
# podman network create wikinet- Create the pod for the Xwiki and mysql containers. Note; we are exposing the port which will be used by Xwiki. We also use the network created in the previous step:
# podman pod create --name wikipod -p 8080:8080 --network wikinet- The following command will pull and start mysql container from docker.io:
# podman run --dt -rm \ --pod=wikipod \ --name mysql-xwiki \ -v mysql_db:/var/lib/mysql \ -v mysql_init:/docker-entrypoint-initdb.d \ -e MYSQL_ROOT_PASSWORD=xwiki \ -e MYSQL_USER=xwiki \ -e MYSQL_PASSWORD=xwiki \ -e MYSQL_DATABASE=xwiki \ -d mysql:5.7 \ --character-set-server=utf8mb4 \ --collation-server=utf8mb4_bin \ --explicit-defaults-for-timestamp=1 - The following command will pull and start the Xwiki container. Please note: DB_HOST uses the wikipod as the host:
# podman run -dt --rm \ --pod wikipod \ --name xwiki \ -v xwiki_config:/usr/local/xwiki \ -e DB_USER=xwiki \ -e DB_PASSWORD=xwiki \ -e DB_DATABASE=xwiki \ -e DB_HOST=wikipod xwiki:lts-mysql-tomcat - Open the port on the firewall to allow communication to port 8080/tcp:
# firewall-cmd --add-port=8080/tcp --permanent # firewall-cmd --reload - Generate systemd unit files:
- 9.1 Change directory to /etc/systemd/system
- 9.2 Run the following commands:
# podman generate systemd --new --files --name wikipod # systemd enable --now pod-wikipod.service # systemd status pod-wikipod.service - Open the URL and specify the port: http://rh9.example.net:8080
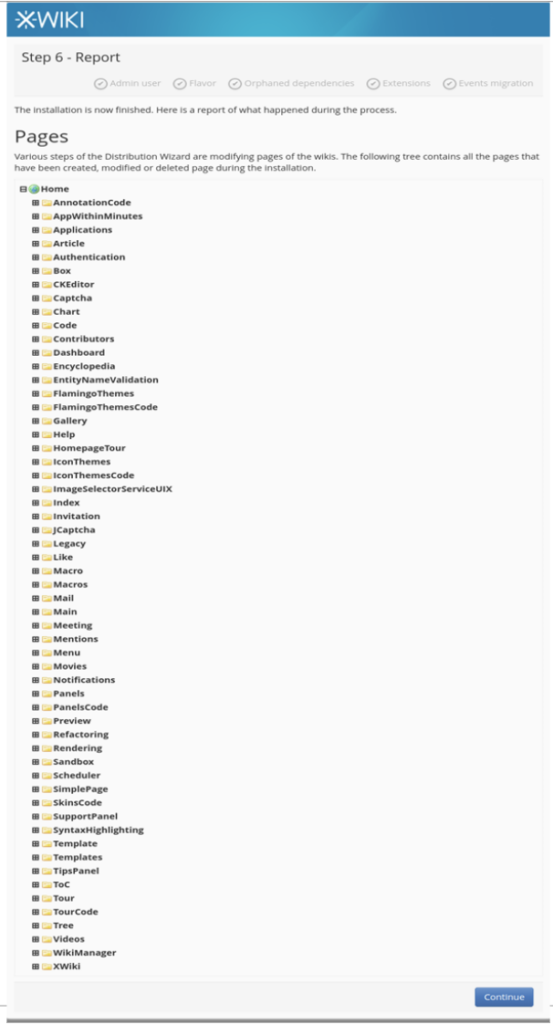
- 10.1 Wait for the Xwiki to start and follow the configuration as outlined in the following screenshots:
- 10.2 Click ‘Continue’.

- 10.3 In Step 1 – Admin user, populate all the fields and click ’Register and login’.

- 10.4 Click ‘Continue’ in Step 1 – Admin User.

- 10.5 Select ‘Xwiki Standard Flavor’ and click ‘Install this flavor’.

- 10.6 Click ‘Install’.

- 10.7 In Step 2 – Flavor, click ‘Continue’.

- 10.8 Wait for the process to finish and click ‘Continue’.

- Wait for the process to finish and click ‘Continue’.

- This concludes the guide.
If you would like to read more about containers and more, check out our blog.
For more help please drop us a message via our contact us form.


