Requirements
- Ansible Automation Platform, Ansible Tower or AWX installed and configured
- RH SSO or Keycloak installed and configured
- Access to both consoles
SSO Realm Configuration
- Navigate to RH SSO console: https://sso01.avail.insentra.net.au:8443/auth or any other
- Log in as ‘admin’
- Create a new realm called ‘tower’ (keep it lowercase)
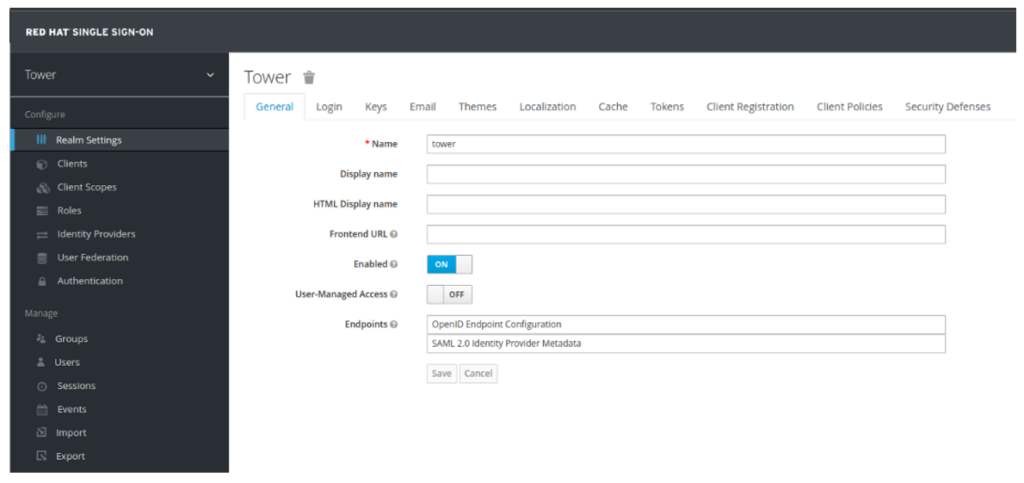
- Click on Keys Tab, navigate to Providers, and have a look at all the providers (certificates)
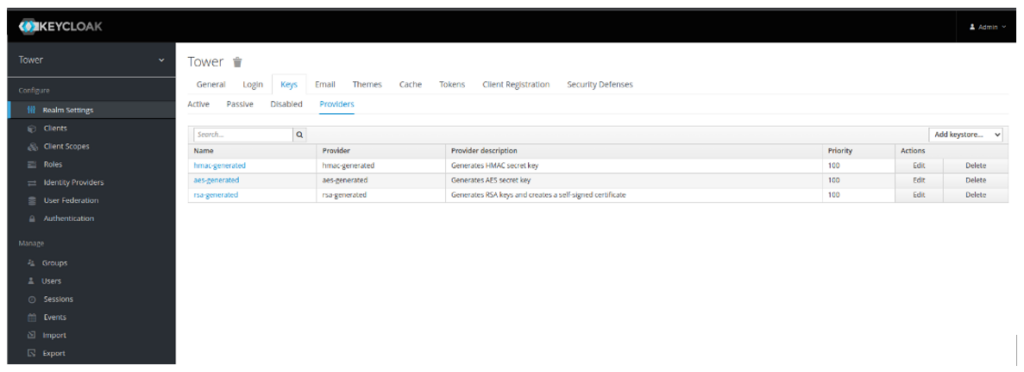
- Open ssh session to a Linux server and generate a new private key and certificate for the realm. Given it is a certificate for the SSO realm, you need to specify the FQDN of the SSO server (RH SSO or Keycloak). In case your servers are behind the Load Balancer or a proxy, ensure to specify the FQDN of the LB or Proxy:
[root@sso01 certs2]# openssl req -new -x509 -days 3650 -nodes -out saml.crt -keyout saml.key
Generating a RSA private key
...........................+++++
................................+++++
writing new private key to 'saml.key'
-----
You are about to be asked to enter information that will be incorporated
into your certificate request.
What you are about to enter is what is called a Distinguished Name or a DN.
There are quite a few fields but you can leave some blank
For some fields there will be a default value,
If you enter '.', the field will be left blank.
-----
Country Name (2 letter code) [XX]:AU
State or Province Name (full name) []:NSW
Locality Name (eg, city) [Default City]:Sydney
Organisation Name (eg, company) [Default Company Ltd]:Red Hat
Organizational Unit Name (eg, section) []:Consulting
Common Name (eg, your name or your server's hostname) []:sso01.avail.insentra.net.au
Email Address []:
- If you created the files on a remote machine, copy both files (saml.crt and saml.key) to your local machine from which you are connecting to your SSO server
- Ensure to set relaxed read permissions on saml.key, otherwise UI will not be able to read the file.
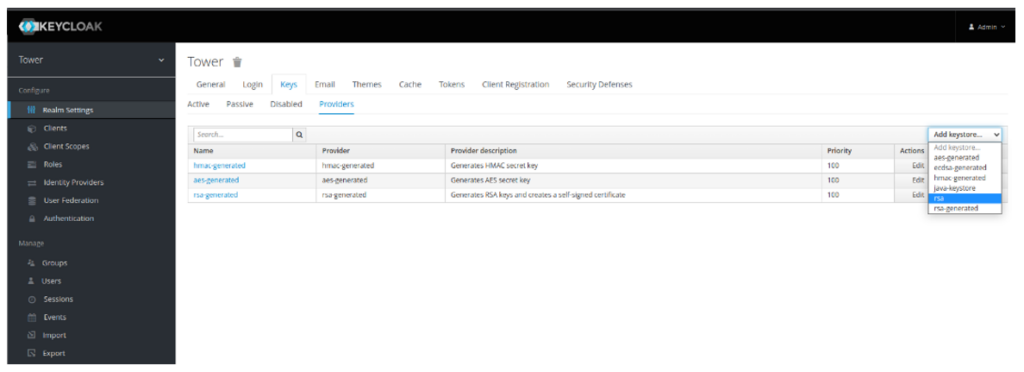
chmod 777 saml.key- Still in the context of SSO realm configuration, on Keys tab, ensure you are in Providers Tab and click Add keystore → rsa
- Change the name to RHSSO, set the Priority to 100 and select both: private RSA Key and X509 Certificates
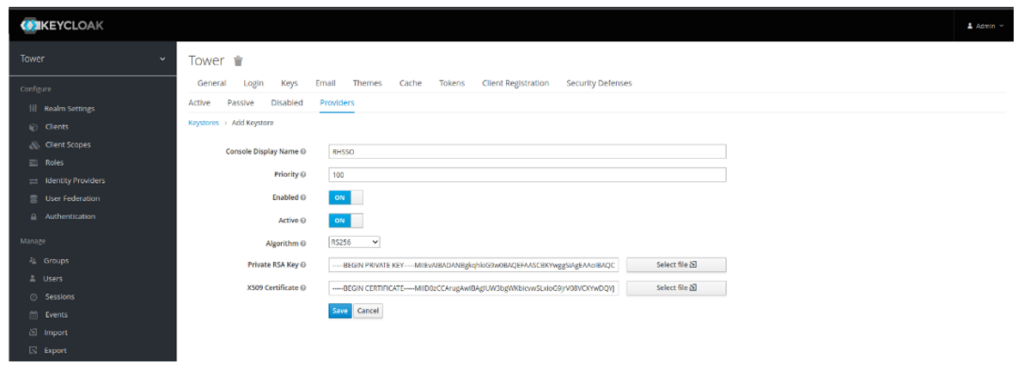
- Click Save and go back to Providers. You should see something similar to this:
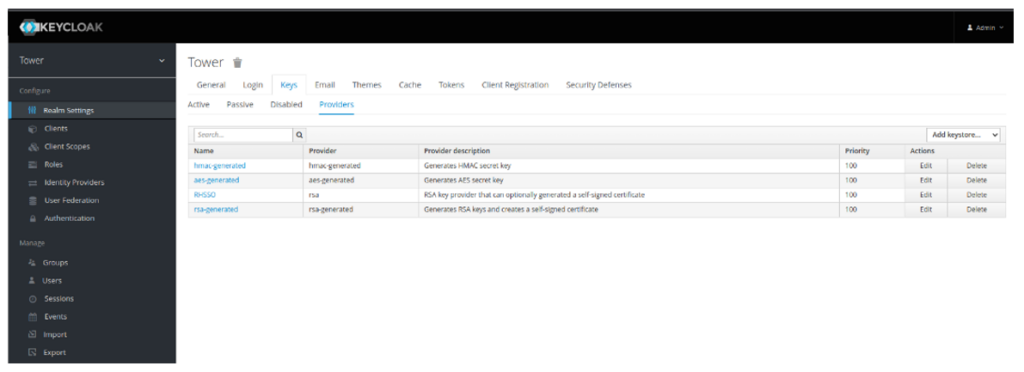
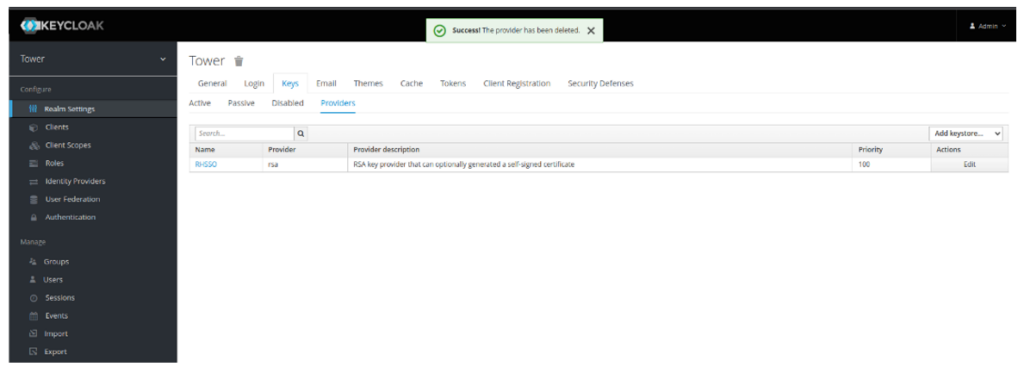
- Remove all other providers but RHSSO:
Ansible Automation SAML Configuration
- Navigate to your Ansible Automation Controller and login with System Administrator privileges
- Navigate to Settings (bottom left side of the screen) and select Miscellaneous System Settings on the right. Verify what is Base URL of the service is. By default, when the Ansible Tower or Ansible Automation Platform is installed, this variable will be set to https://tower. If this value is still https://tower, change it to either the FQDN of the Load Balancer or the server’s name of the single Automation Controller. In this example the Automation Controller has been installed on a single node and as such its Base URL of the service has been set to https://ssodb04.example.net:
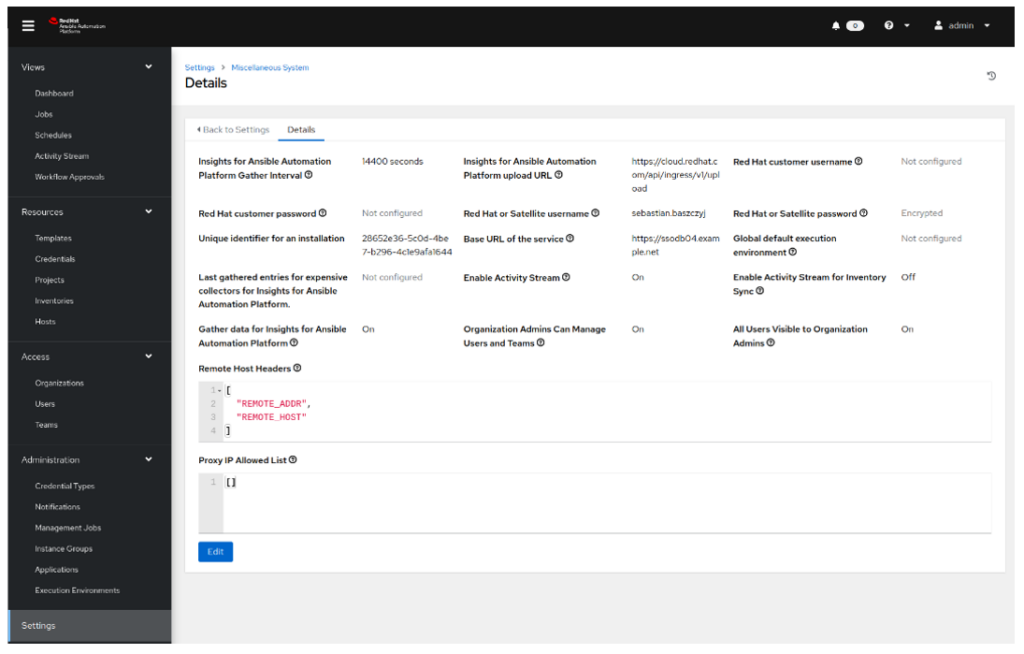
- Save the value of Base URL of the service. We will need this value in the next step
- Click on Settings (left side) and select SAML settings
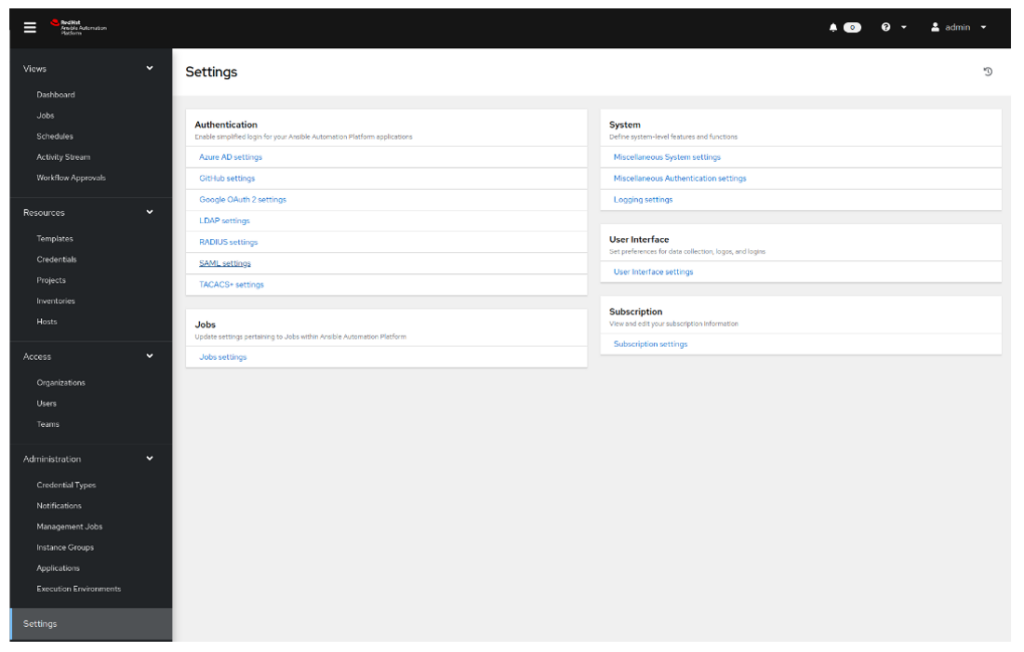
- Scroll to the bottom of the page and click edit
- Set SAML Service Provider Entity ID to the value of Base URL of the service from the previous step. In this case it is https://ssodb04.example.net
- Leave Automatically Create Organisations and Teams on SAML Login enabled

- Specify the SAML Service Provider Public Certificate.
NOW… There are a few ways of doing this, but this is the certificate you need to generate for your Ansible Controller. If your Ansible Controller is in cluster configuration and all the nodes are behind the Load Balancer – you need to generate the Certificate for the Load Balancer FQDN. Otherwise – generate it for the single Ansible Controller node. FOR THE TIME BEING, enter into the SAML Service Provider Public Certificate the certificate we generated for the REALM. WE WILL REPLACE IT LATER with correct ones.
- Add SAML Service Provider Private Key – same logic like in a step above
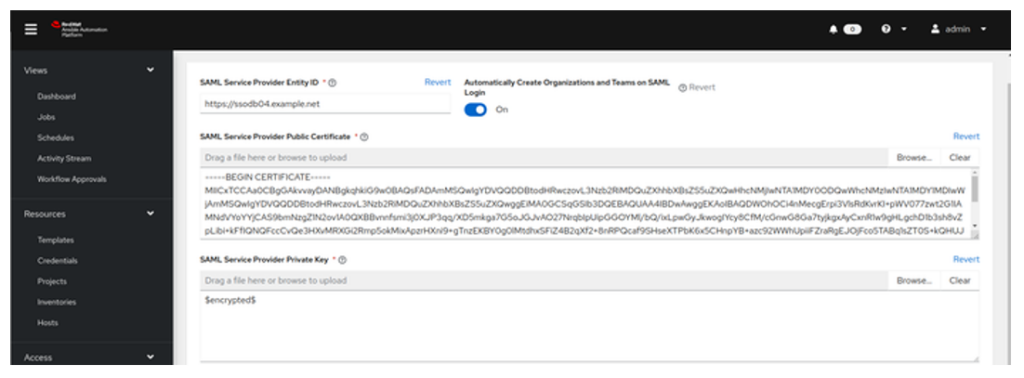
- Specify SAML Service Provider Organisation Info. In this info you need to specify the URL to your SSO authentication service. By Default, RH SSO and Keycloak would run the authentication on port 8443/tcp. Make also sure you specify https as the protocol.
{
  "en-US": {
    "url": "https://sso01.avail.insentra.net.au:8443",
    "name": "RHSSO",
    "displayname": "RHSSO"
  }
}
- Specify SAML Service Provider Technical Contact:
{
  "emailAddress": "arnold.schwarzenegger@example.net",
  "givenName": "Arnold Schwarzenegger"
}
- Specify Service Provider Support Contact:
{
  "emailAddress": "arnold.schwarzenegger@example.net",
  "givenName": "Arnold Schwarzenegger"
}
- Specify SAML Enabled Identity Provider:
{
  "RHSSO": {
    "x509cert": "MIIDxTCCAq2gAwIBAgIUDgj+kvdvCoBx267JWdtWqTfC4hcwDQYJKoZIhvcNAQELBQAwcjELMAkGA1UEBhMCQVUxDDAKBgNVBAgMA05TVzEPMA0GA1UEBwwGU3lkbmV5MREwDwYDVQQKDAhJbnNlbnRyYTELMAkGA1UECwwCSVQxJDAiBgNVBAMMG3NzbzAxLmF2YWlsLmluc2VudHJhLm5ldC5hdTAeFw0yMjA1MDUwNTI1MDNaFw0yMzA1MDUwNTI1MDNaMHIxCzAJBgNVBAYTAkFVMQwwCgYDVQQIDANOU1cxDzANBgNVBAcMBlN5ZG5leTERMA8GA1UECgwISW5zZW50cmExCzAJBgNVBAsMAklUMSQwIgYDVQQDDBtzc28wMS5hdmFpbC5pbnNlbnRyYS5uZXQuYXUwggEiMA0GCSqGSIb3DQEBAQUAA4IBDwAwggEKAoIBAQC6rIocKD4Hu6gL8ULYYUUo9nSCjORPgZ6+JQGfegjmhVhcaMyMO0igRkVq+Wpj0h3oAn4LB9Ccrg+iACNDPx43oUEJX3ulULln8RLdXOAYllMZEu/FhTQA/LTmKDTNHncOKXbuKyQtnvWp+6LQLKPH/kQMY/P1acEYeAC6FyVOC30MOO0151+Wns9wfSxSd3QJsRAIb8yu2LoFefej8jNXSvG0F+8CrEKfycOLRjbm3r0qnFL+GCegFYZ8FJdjmE2qHE0xmQbxrOhx9AnALfQITfhl8rCL6xTpk/gRMcd4mROyuSRucfoNAGSPb7jJTVHNB2MgtRkILcGH859dU6zHAgMBAAGjUzBRMB0GA1UdDgQWBBSnfA9+GmlUh1wUVIg3K8aBNULxJzAfBgNVHSMEGDAWgBSnfA9+GmlUh1wUVIg3K8aBNULxJzAPBgNVHRMBAf8EBTADAQH/MA0GCSqGSIb3DQEBCwUAA4IBAQBAUjHRL7Anzvu6qevVOxMyfe0ZTTRDPLfXtrS30TyFcXlig4n4kTSvy4Cd7244AUGNphDxsDMpONirkq5T7PLYwsrseqVNMhc4k9wexLHT5WtwiWX6U/XAPei7iLQQJG7b3sTtu2FaW1bk7dBgWixzBoCTMlKhUkYrzAqOSiuLx/lbMkU19C+BigpeEhGzeJT8XmyreVgrFK8HjQuN4hIVywJub1lDYcRcG3GclsLJ0UTgz3qyp3fy7H43SiisjvwRh7MLAvbUvyiLuitjMUgAFNI5RiXXvdRxAH1xErG2IK2tUW32T5ZboEpr7+4CVXCsQ1SC9B0Fy0X3AFCzv1PO",
    "attr_first_name": "first_name",
    "attr_email": "email",
    "url": "https://sso01.avail.insentra.net.au:8443/auth/realms/tower/protocol/saml",
    "attr_user_permanent_id": "name_id",
    "entity_id": "https://sso01.avail.insentra.net.au:8443/auth/realms/tower",
    "attr_groups": "groups",
    "attr_last_name": "last_name",
    "attr_username": "username"
  }
}
x509cert – this is the certificate that was generated for the Realm. Navigate to your realm (tower), click on Keys and in Active Tab you should see your RHSSO certificate. Click on Certificate and copy the value to the clipboard. Ensure the string has been copied as indicated above. No Begin Certificate nor End Certificate are required.
URL – this is your RH SSO authentication. The string has to include https://<FQDN_OF_SSO_SERVER>:8443/auth/realms/tower/protocol/saml
Where ‘tower’ in the string above is the name of the realm you have created. Change it if required (keep in mind we are dealing with Linux – so it is case sensitive).
entitiy_id: https://<FQDN_OF_SSO_SERVER>:8443/auth/realms/tower
- Specify SAML Organisation Map. The following presents the simple config:
{
  "Default": {
    "users": true
  },
  "Systems Engineering": {
    "remove_users": false,
    "remove_admins": false,
    "users": true,
    "admins": [
      "arnold.schwarzenegger@example.net"
    ]
  }
}
- Specify SAML Security Config
{
  "requestedAuthnContext": false
}
- Save the config. Verify if all the fields have been accepted. The most common issue is related to the json formatting.
- Open a command line and run the following command. This command will execute the API call and export the client configuration for the RH SSO.
curl -k -L http://ssodb04.example.net/sso/metadata/saml/ > client-import.xml- Verify if the file is NOT empty. If it is empty – check the syntax of the command and if it still does not work, consider if the firewall permits the communication and if the SAML configuration has been finished successfully.
Configuration of the Client, Client Scopes on RH SSO
- Navigate to the RH SSO and log in as admin
- Open the ‘tower’ realm and click on Clients
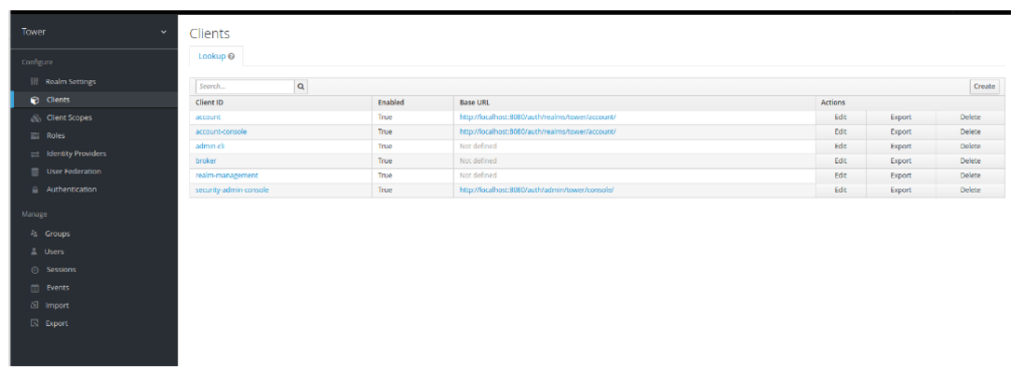
- Click Create in the right top corner and click Select file we generated in the step above using ‘curl’ command (client-import.xml). Click Save. You will be taken to Settings
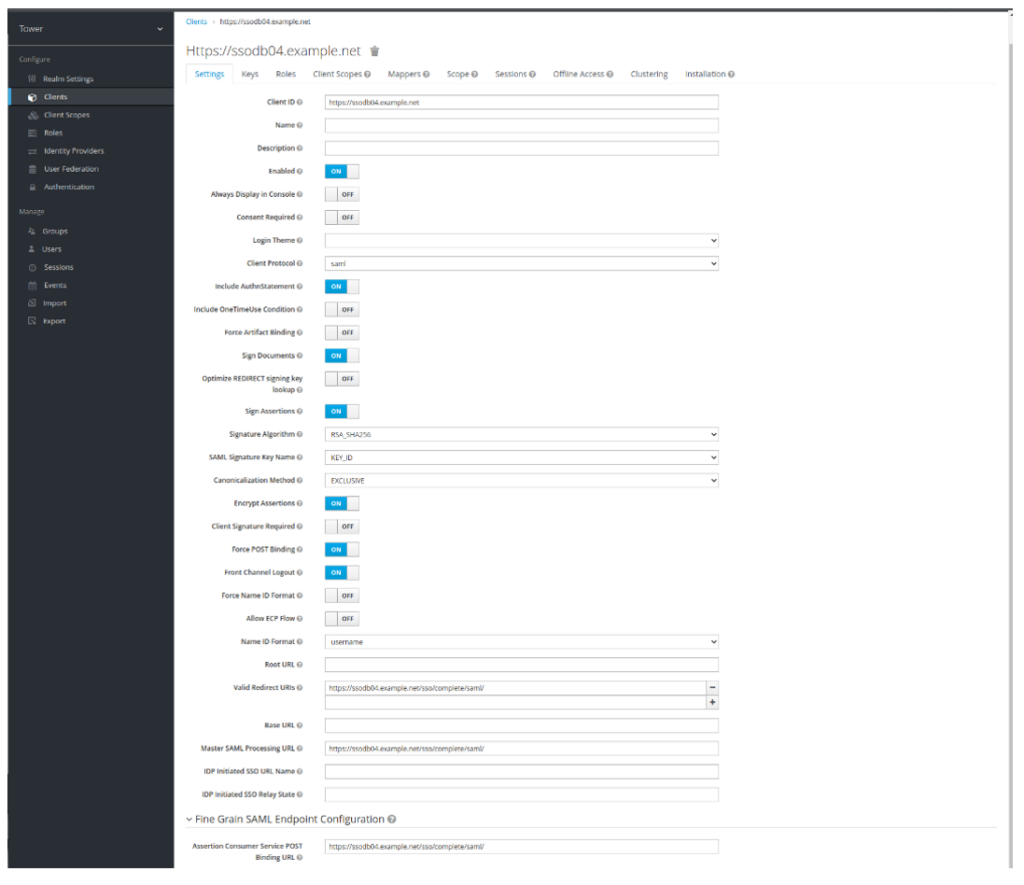
- Change the following settings:
| Parameter | Value | Explanation |
| Sign Documents | On | |
| Sign Assertions | On | |
| Encrypt Assertions | On | |
| Client Signature Required | On | |
| Force POST Binding | On | |
| Valid Redirect URIs | https://ssodb04.example.net/sso/complete/saml/ | It is your single node FQDN or LB FQDN |
| Master SAML Processing URL | https://ssodb04.example.net/sso/complete/saml/ | |
| Assertion Consumer Service POST Binding URL | https://ssodb04.example.net/sso/complete/saml/ |
- Click Save. Your configuration should resemble this:
- Click on Keys. This is the Key you generate for the Ansible Controller FQDN or Load Balancer FQDN. You can either do it manually and import it here or generate the key here.
- Click Generate new keys
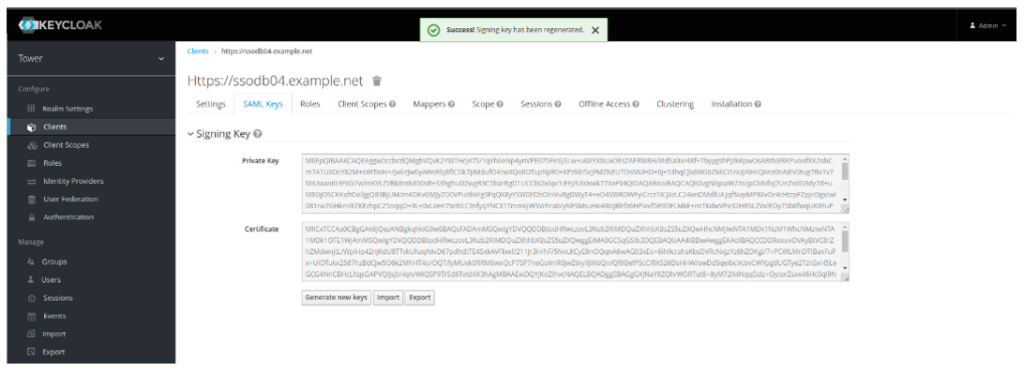
- Click on Export under the Certificate. Change Archive Format to PKCS12, specify Key Password, Store Password, and click Download:
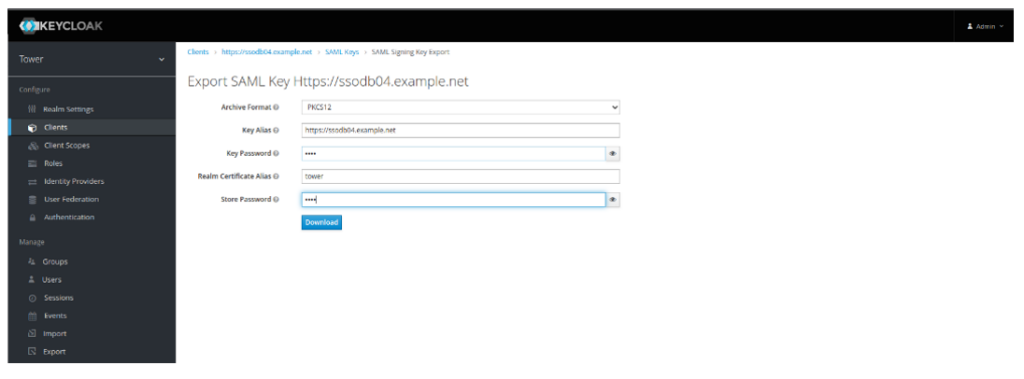
- Open the command line and convert the p12 to unencrypted private key:
[root@seba Downloads]# openssl pkcs12 -in keystore.p12 -out keystore.txt
Enter Import Password:
Enter PEM pass phrase:
Verifying - Enter PEM pass phrase:
Error outputting keys and certificates
405C18EE877F0000:error:0308010C:digital envelope routines:inner_evp_generic_fetch:unsupported:crypto/evp/evp_fetch.c:349:Global default library context, Algorithm (RC2-40-CBC : 0), Properties ()
- Run another command to save the private certificate in an unencrypted pem format:
[root@seba Downloads]# openssl rsa -in keystore.txt -out keystore.unencrypted
Enter pass phrase for keystore.txt:
writing RSA key
- Do you remember that in Ansible Automation SAML Configuration configuration, you entered Certificate and Private key we generated for the Realm? It is time to replace those keys with proper ones
- Navigate back to Ansible Automation Controller → Settings → SAML
- Scroll to the bottom and click edit
- Replace SAML Service Provider Private Key with the content of keystore. unencrypted from the step above
- Replace SAML Service Provider Public Certificate with the Certificate from the Client Key section. Remember to add to the certificate the following: —–BEGIN CERTIFICATE—–|—–END CERTIFICATE—–. There are 5 dashes before and after.
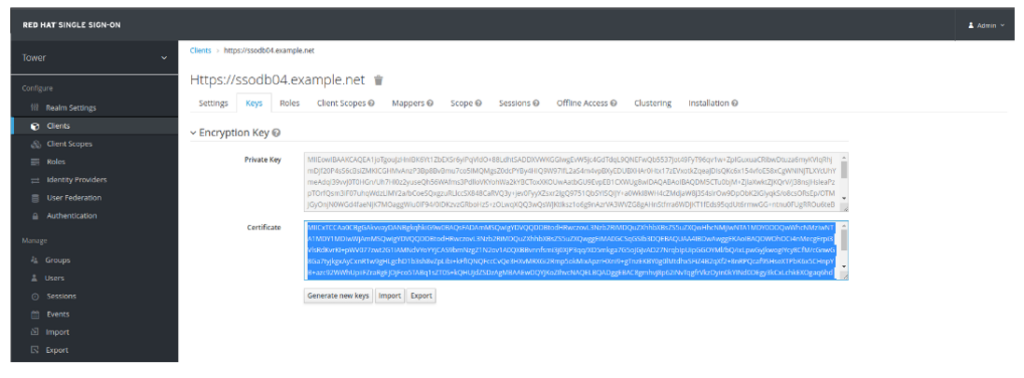
- Click Save in the Ansible Automation Controller SAML Config page
- Navigate back to the RH SSO
- Click on Client Scope of your ‘tower’ realm
- Find rolelist Client Scope. Click on it
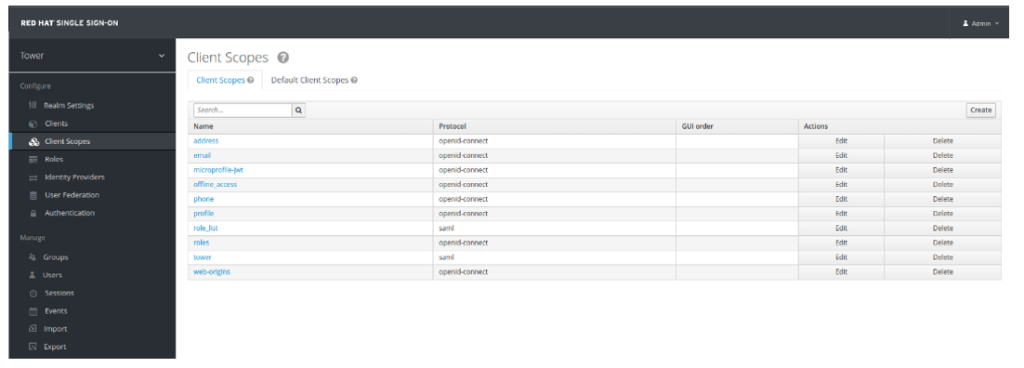
- Click on Mappers Tab and click role list. Ensure Single Role Attribute is set to ON and click SAVE:
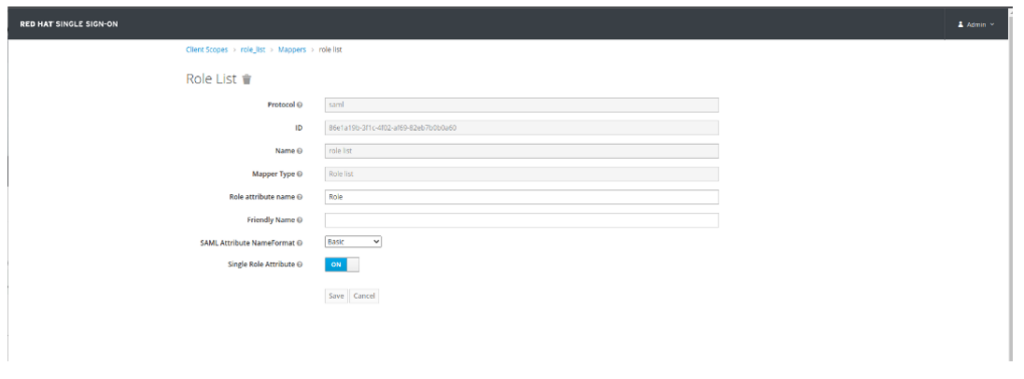
- Navigate back to Client Scopes. Click Create. Specify tower for name and select saml as the Protocol. Click Save:
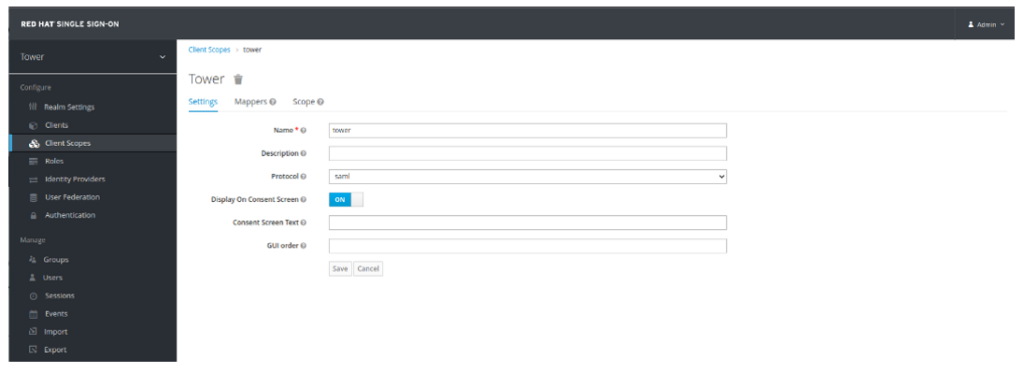
- Click on Mappers Tab and create the following Mappers:
| Name | Mapper Type | Property | Friendly Name | SAML Attribute Name | SAML Attribute NameFormat |
| first_name | User Property | firstName | First Name | first_name | Basic |
| user_name | User Property | username | User Name | username | Basic |
| User Property | Basic | ||||
| user_permanent_id | User Attribute | uid | name_id | name_id | Basic |
| last_name | User Property | lastName | Last Name | last_name | Basic |
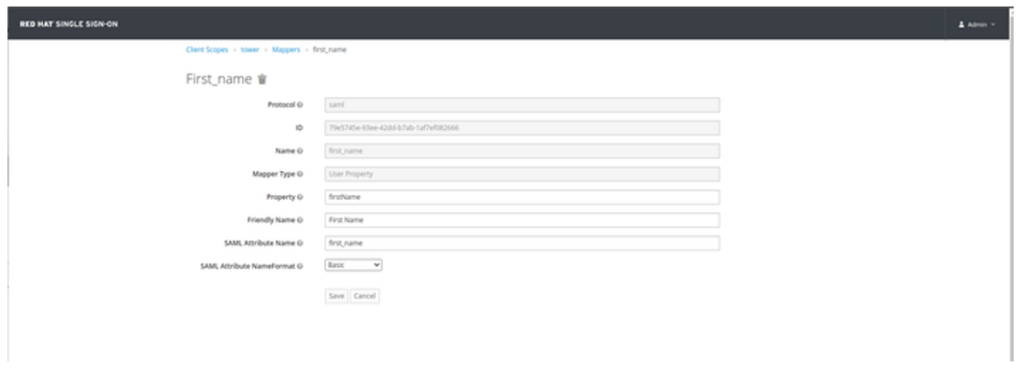
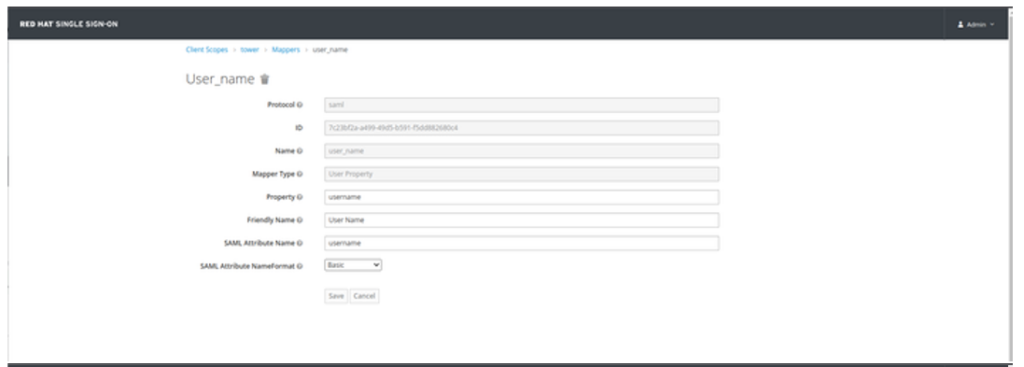
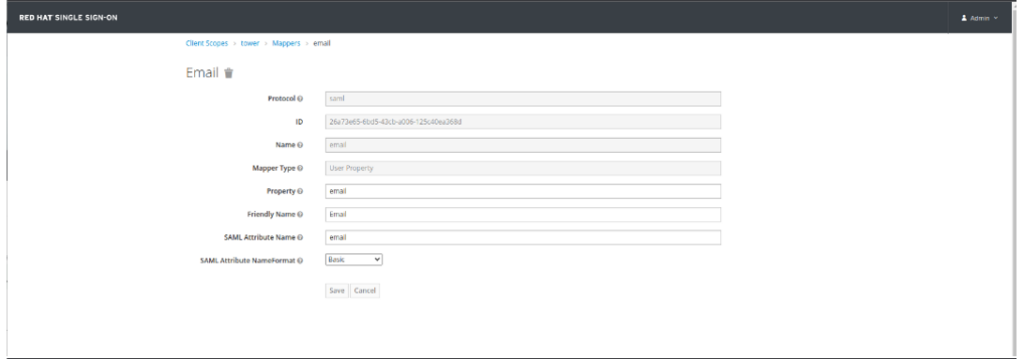
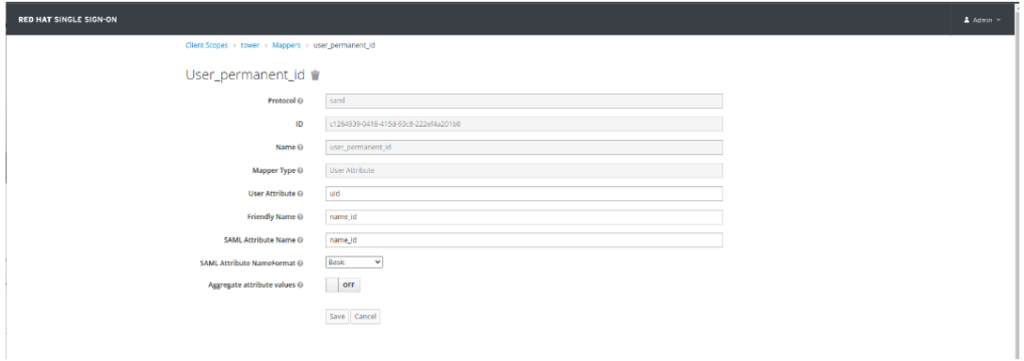
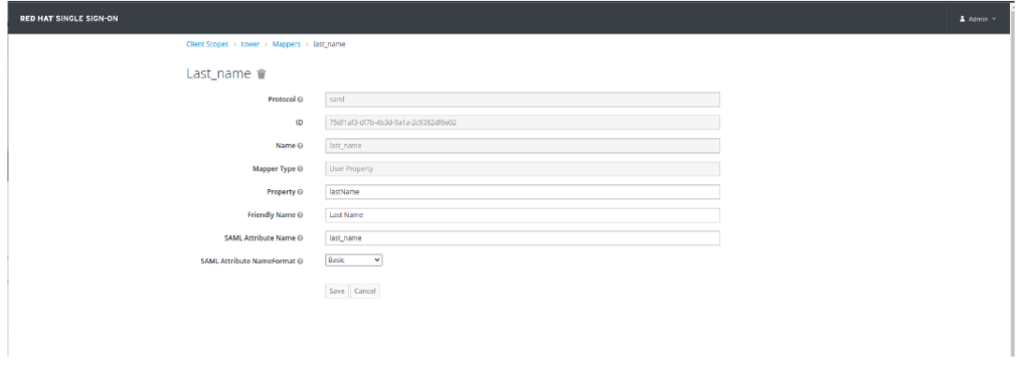
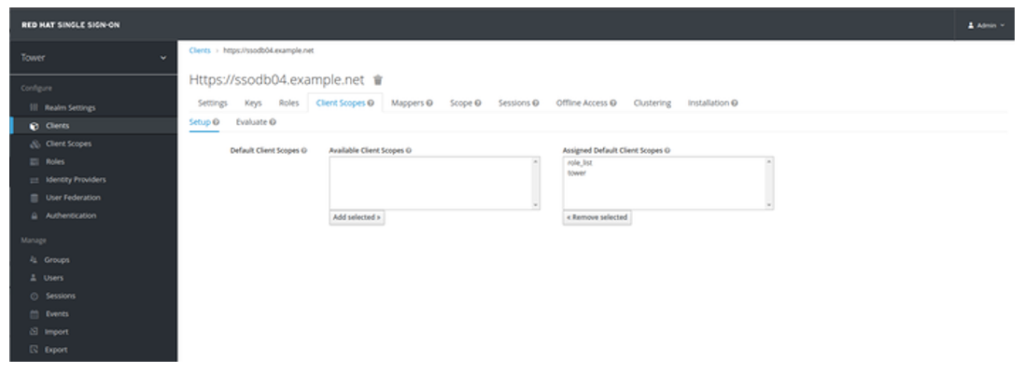
- Navigate to Clients, select your client, click on Client Scopes Tab, and add your new scope (tower):
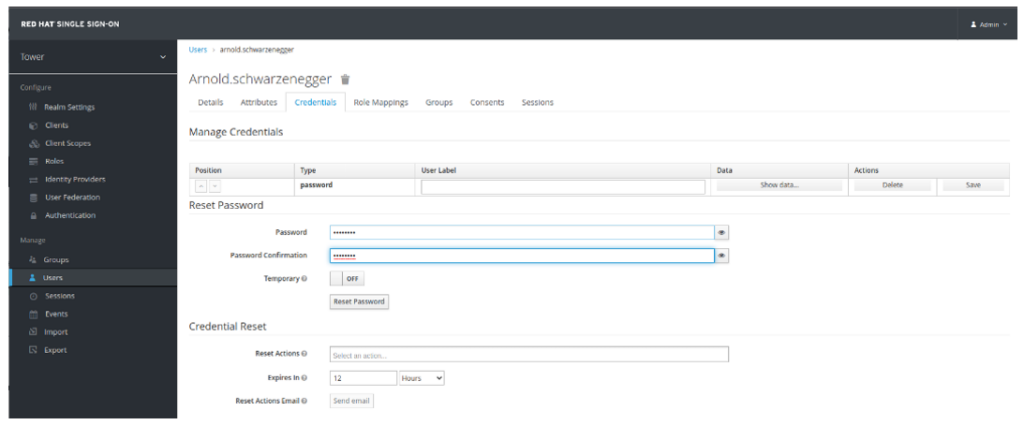
- Navigate to Users and create a test user. Click Save
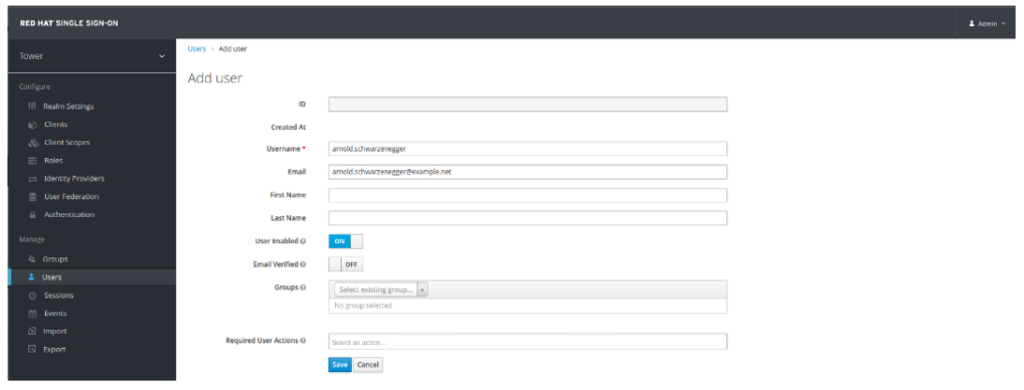
- Click on Credentials Tab. Set Temporary to OFF and set the password.
- Time to test. Log out from the Ansible Automation Controller
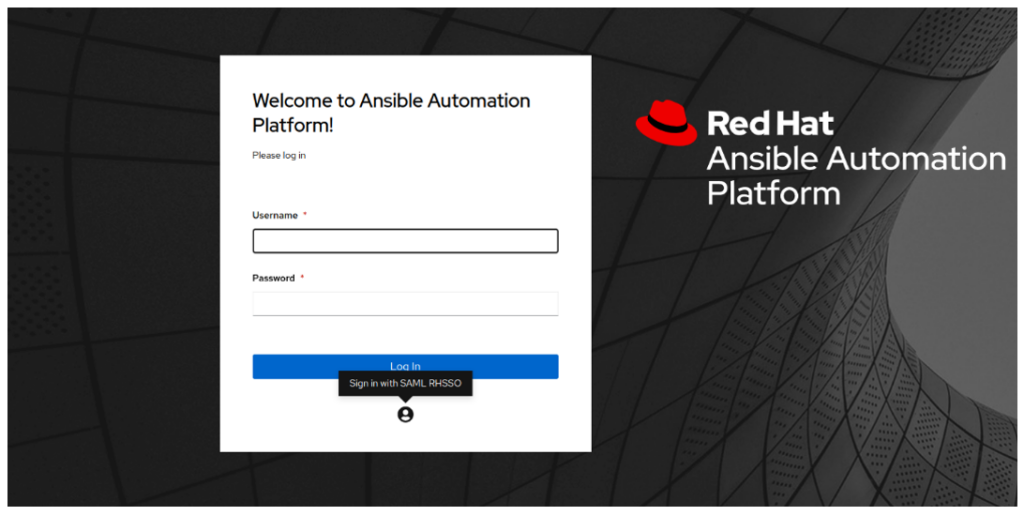
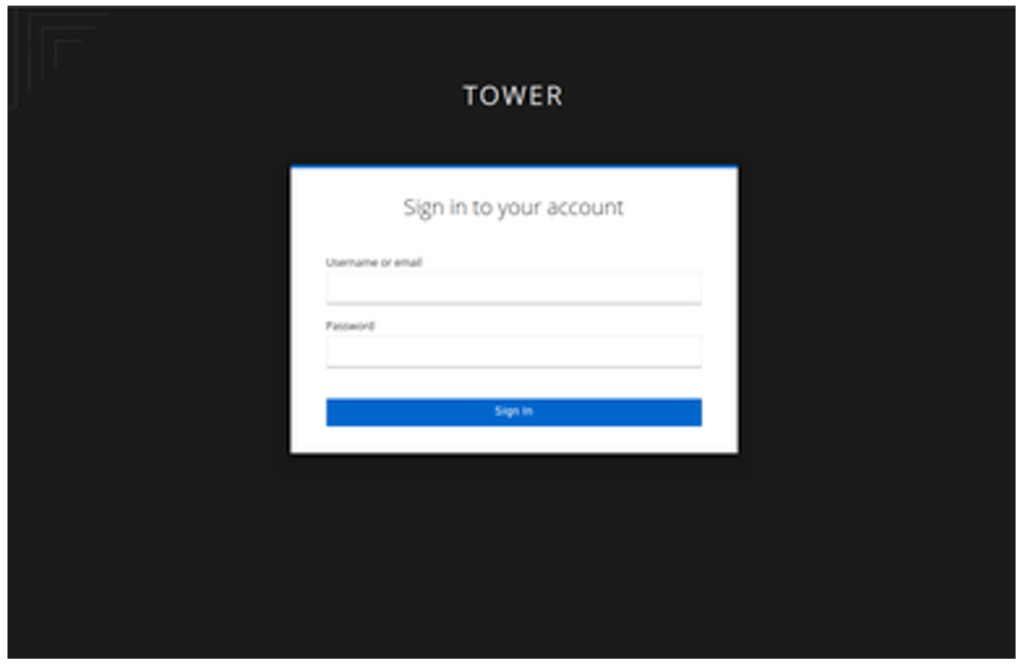
- Click on Sign in with SAML. You should be taken to the RH SSO/Keycloak:
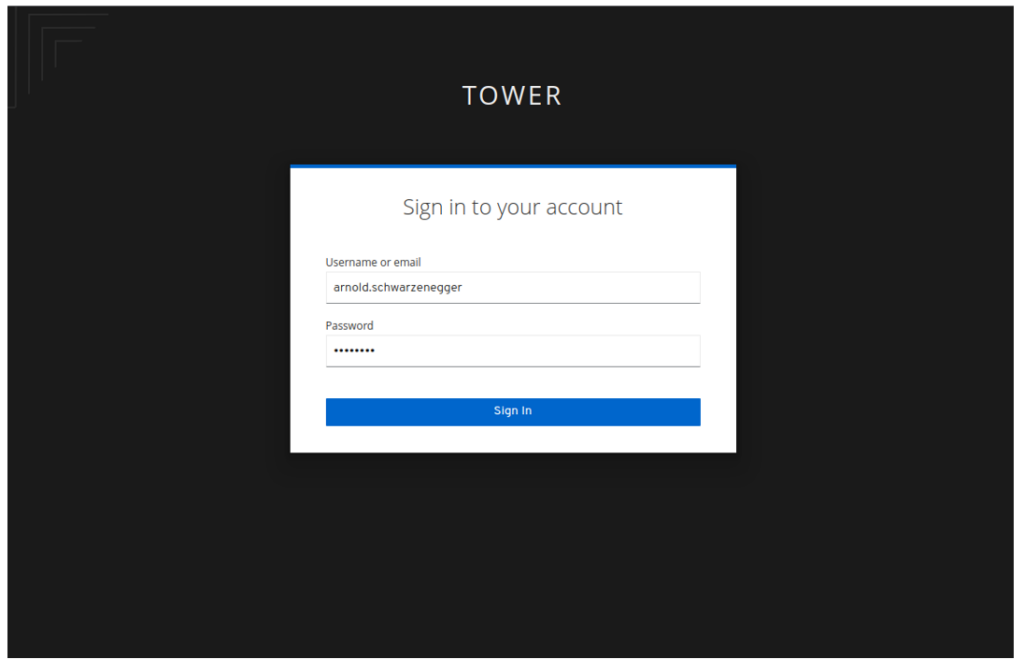
- Enter the user we created before in SSO and click Sign In. You should be logged into the Ansible Automation Controller
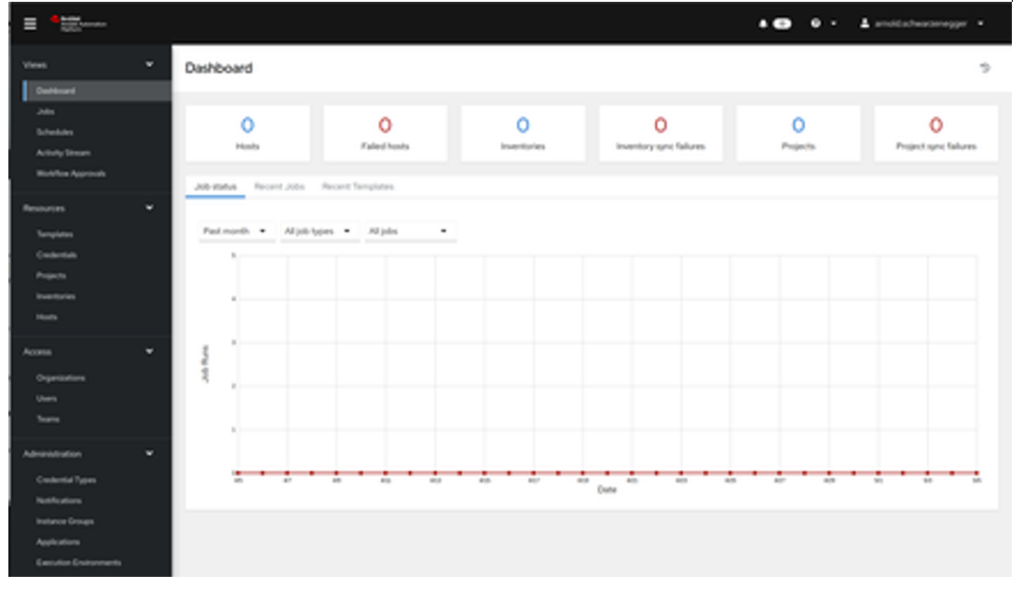
- Verify the Sessions in RH SSO. Navigate to RH SSO, find Sessions on the left and click on it. On the right side you should see Realm Sessions and the client’s name, including the number of active sessions:
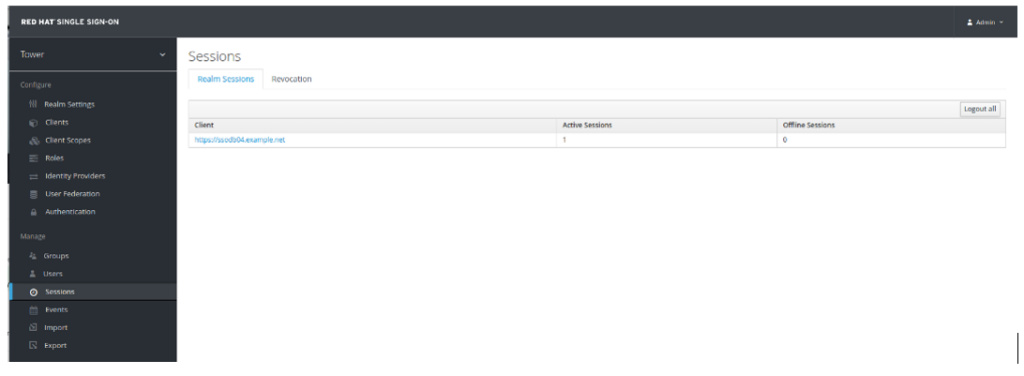
- Click on the client. You will be taken to Sessions Tab in Client’s configuration page. If you cannot see your session(s), click on Show Sessions on the right side:

This concludes the tutorial


