A sorely missing function of Azure AD Connect is here! It has always been a difficult task to migrate this critical application to a new server. Making sure you capture all the settings for the new server was difficult and you always had a nagging concern you might make a mistake which would cause unknown havoc!
Well, fear not! As of version 1.5.42.0, Microsoft has added a new feature to address this. For full details see Import and export Azure AD Connect configuration settings.
Note: at the time of this writing, this function is still in Preview
This blog is part 2 of 2 and will go through the process of exporting from a server running an older version of Azure AD Connect which does not have this functionality. Part 1 went through the process if the new server is running a version that supports this functionality.
It is recommended to compare the new and old servers before going live. This is accomplished by leaving the new server in Staging Mode, which is the default setting when using this method, then removing Staging Mode once settings are validated.
HOW TO EXPORT
Migration requires running a PowerShell script which extracts the existing settings you can then use on a newly installed server.
Extract Script
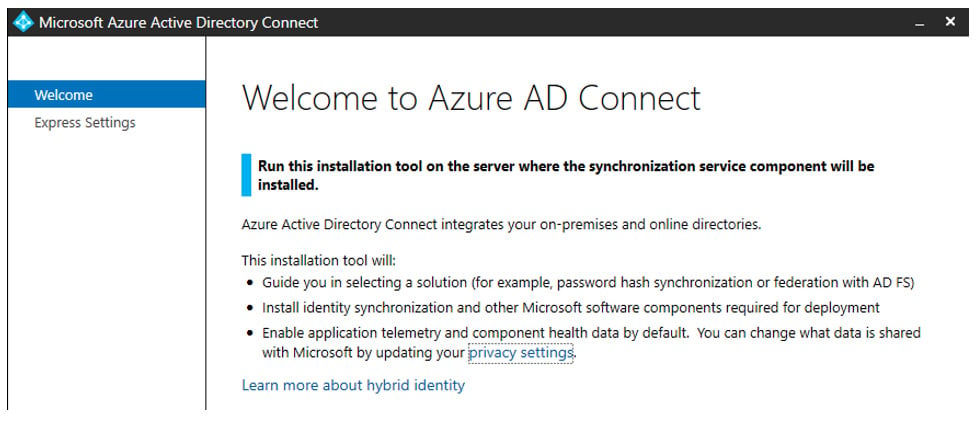
To begin, we need to get a copy of the export script which is included on a new installation. On the new server, download the latest version of Azure AD Connect. Start the install and then stop when you get to the Welcome screen

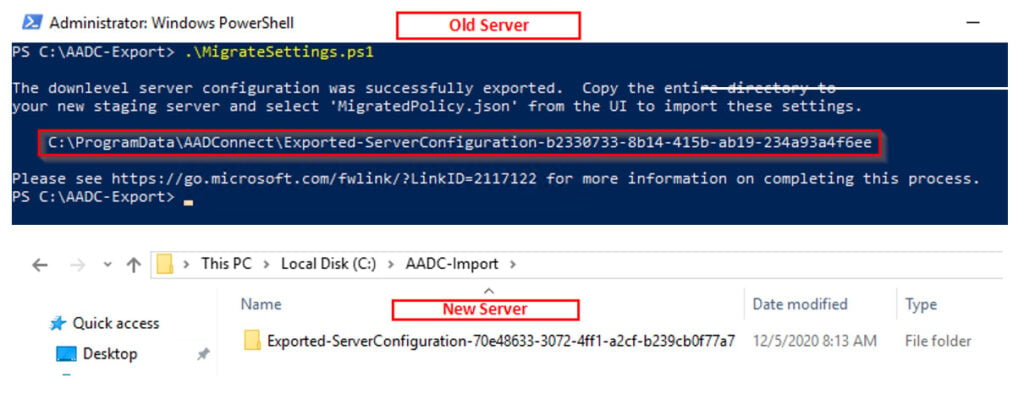
Go to C:Program FilesMicrosoft Azure Active Directory ConnectTools and copy the MigrateSettings.ps1 file to the old AADC server

Export Process
On the old server, open PowerShell and run the script. The exported configuration will be saved to %ProgramData%AADConnect. This will create a folder in this format, Exported-ServerConfiguration-TimeStamp. Copy the entire folder to the new server

HOW TO IMPORT
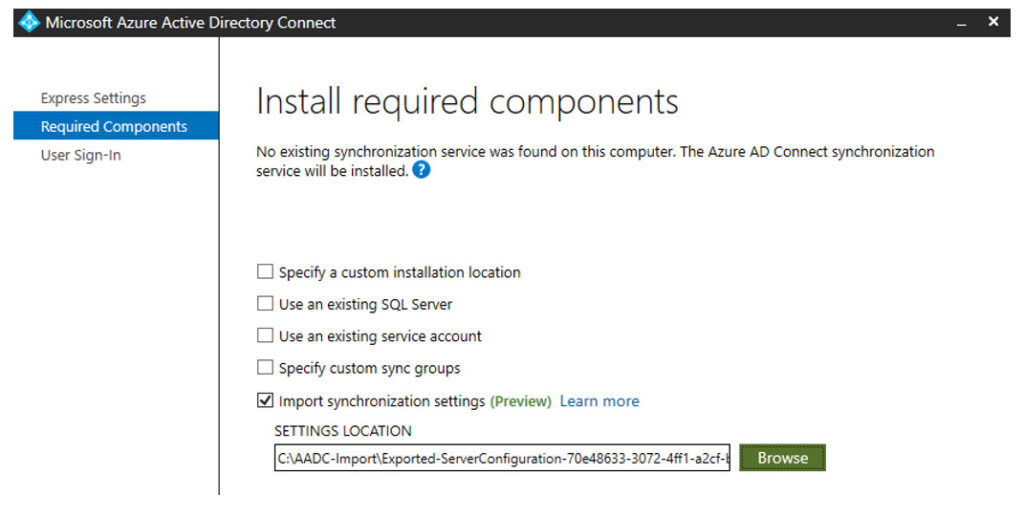
Now proceed with the installation wizard. On the Welcome screen, click Customise and then you can choose to Import synchronization settings, go to the folder you copied and choose the file called MigratedPolicy.json

You will need to provide the following when clicking Install, all other changes can be made after installation from the Azure AD Connect wizard:
- Azure Active Directory credentials: The account name for the Azure Global Administrator used to configure the original server is suggested by default. It must be changed if you want to synchronize information to a new tenant
- User sign-in: The sign-on options configured for your original server are selected by default and automatically prompt for credentials or other information which is needed during configuration. In rare cases, there might be a need to set up a server with different options to avoid changing the behaviour of the active server. Otherwise, select Next to use the same settings
- On-premises directory credentials: For each on-premises directory included in your synchronization settings, you must provide credentials to create a synchronization account or supply a pre-created custom synchronization account. This procedure is identical to the clean install experience with the exception that you can’t add or remove directories
- Configuration options: As with a clean install, you might choose to configure the initial settings for whether to start automatic synchronization or enable Staging mode. The main difference being Staging mode is intentionally enabled by default to allow comparison of the configuration and synchronization results prior to actively exporting the results to Azure
Validate
Now you should validate the new installation to confirm all settings have been imported successfully. Manually inspect and compare the settings between the old and new servers. Once confirmed, you can decommission the old server and remove Staging Mode on the new one.
In this blog, we learned how to perform a swing migration to a new Azure AD Connect server when the old server is running an older version. As always, please feel free to reach out to us for assistance!
You can read more of my blogs here and learn more about the importance of protecting Active Directory in this blog series.


